
Proxy Packing Slip
When this occurs the user can send another Prendio User a request for more detail on the invoice. Either the PO, Req, or Cart Number is needed to continue processing the invoice.
Scenarios For The Requester When Responding To This Request:
- If the Requester had previously submitted a cart for this order he or she would reply to the request with the Req Number so the invoice can be processed.
- If the Requester had previously submitted a cart for this order and a Prendio Buyer had already confirmed the order, he or she would reply to the request with the PO Number so the invoice can be processed.
- If the Requester purchased the item(s) outside of Prendio, he or she would reply to the request by creating a cart, and then responding again with the Cart Number.
When a Packing Slip and Receipt are not available the invoice is used as a Proxy Packing Slip in lieu of an actual Packing Slip and Receipt.
When Prendio creates a Proxy Packing Slip it saves a copy of the Scanned Invoice and adds a folio in red to the bottom of that copy similar to this:

The Proxy Packing Slip is then used as a Receipt for the order.
The process of the Accounts Payable User requesting a proxy and the Requester responding is detailed below.
Prerequisite: Pop-ups must be enabled for the Prendio website to complete this process.
Requesting A Proxy:
In the Scan Match window, the invoice is selected.
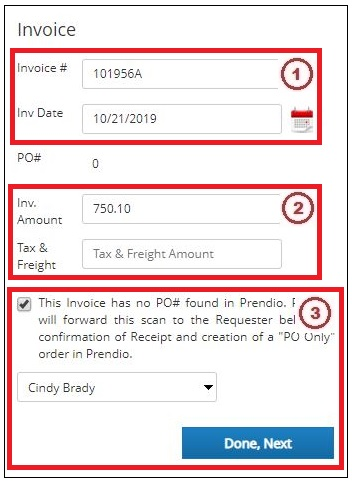
1. The Invoice Number and Date are entered.
2. The Invoice Amount is entered.
3. The PO Number is not known so this box is checked. Checking this box enables a pulldown menu where the user can select which Prendio User to send the request to. Done, Next is then pressed to send the request to the user selected.
Responding To A Proxy Request:
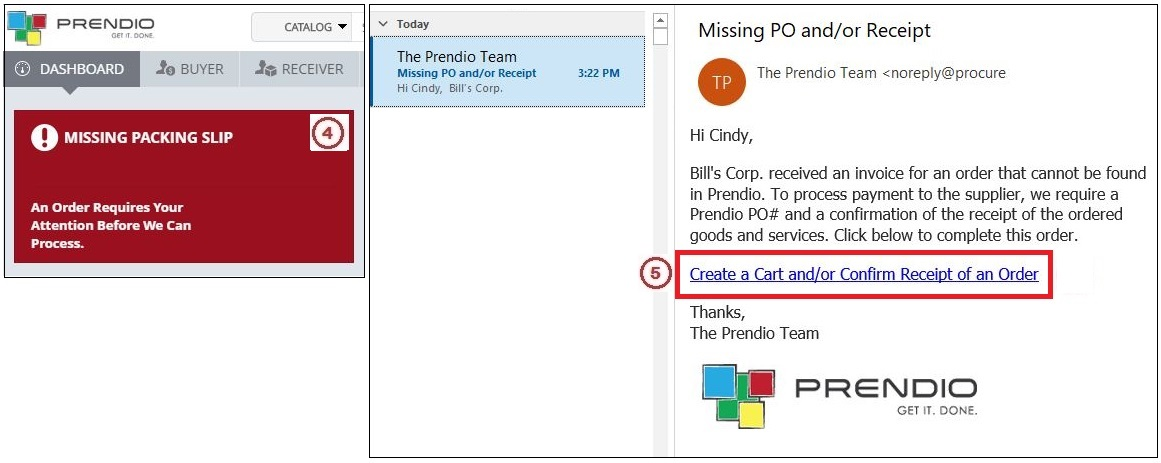
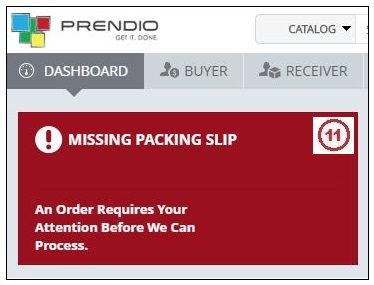
4. The selected user receives a Missing Packing Slip Dashboard Notification.
5. That user also receives a Missing Packing Slip Email Notification.
The requester can either click on the Dashboard Notification or click on the link in the Email Notification to Respond to this request.
This will open the Missing PO# and Packing Slip window.
Note: As explained earlier if the Req or PO Number were available, the Requester could enter this information in the Cart, Req, or PO: field and then press Done.
In this example, a PO or Req Number is not available so a new cart will need to be created.
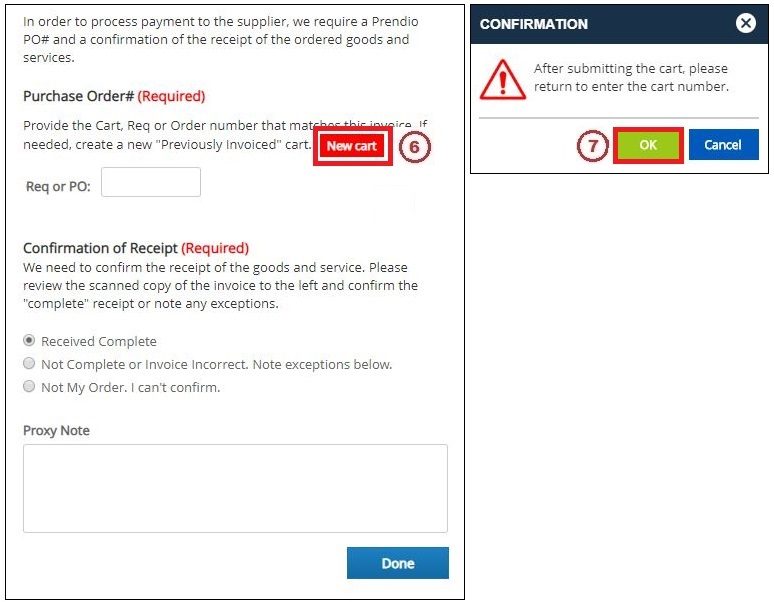
6. The New Cart button is pushed.
7. OK is pressed at Confirmation prompt that appears.
Note: The prompt lets the Requester know that he or she will need to return to this window to enter the cart number after the new cart is submitted.
Creating The New Cart:
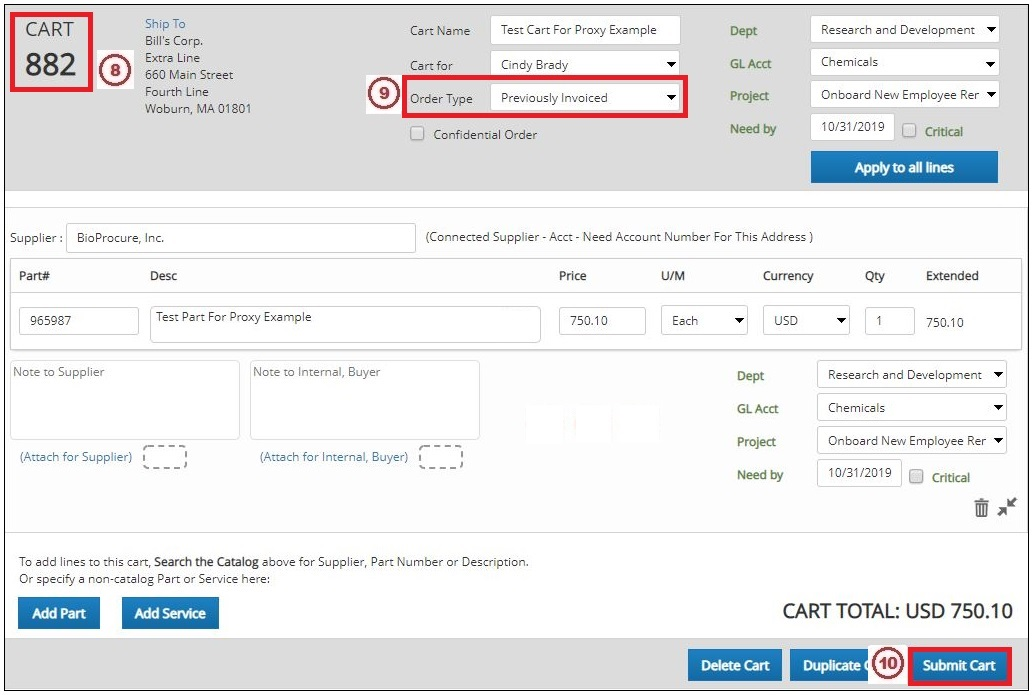
8. A new cart window is opened, note the Cart Number, it will be needed later.
9. The Order Type for these types of orders is Previously Invoiced.
10. Complete all of the required fields for this order, then press Submit Cart.
11. After submitting the cart the user returns to the Prendio Dashboard and clicks on the Missing Packing Slip Notification.
Note: The link in the Email Notification can also be used for this step.
This will again open the Missing PO# and Packing Slip window.
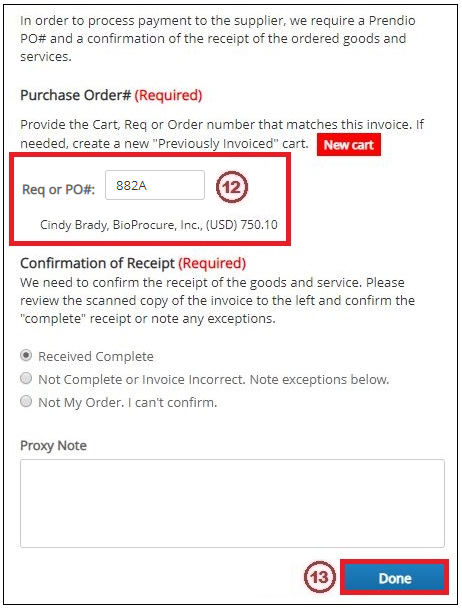
12. Add an A to the Cart Number noted in Step 8, this will be the Req # entr this the Req, or PO: field. In this example 882A is entered
13. Done is then pressed.
The processing of this order can now continue.
Note: If this order exceeded the Requester's Spending Limit, the order would have to go through approvals before continuing.
Receiver > Receipts:

14. Prendio assigned a PO Number and the Receipt # is N/A Proxy on file.
15. Press the View (eyeball icon) to create the receipt.
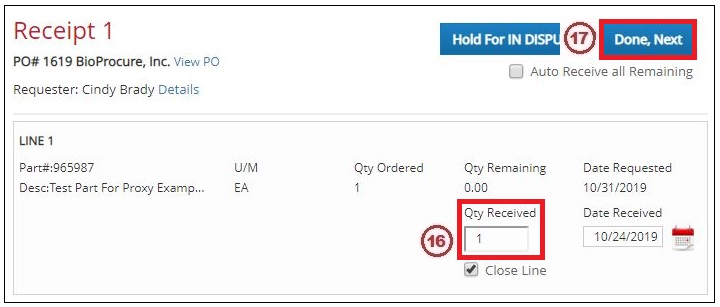
16. The Quantity is entered.
17. Done, Next is pressed.
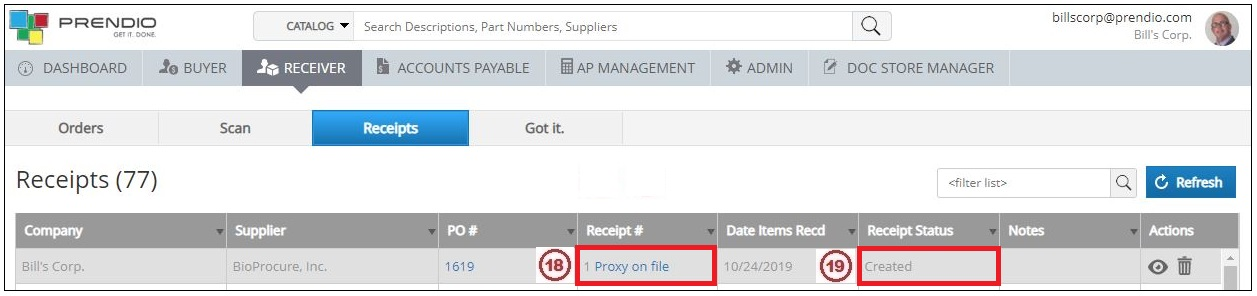
18. The Receipt # is now 1 N/A Proxy on file.
Note: You can click on the "Proxy on file" link to view the Proxy (Invoice with Proxy Folio detailed earlier).
19. The Receipt Status is now Created.
Accounts Payable > Vouchers:
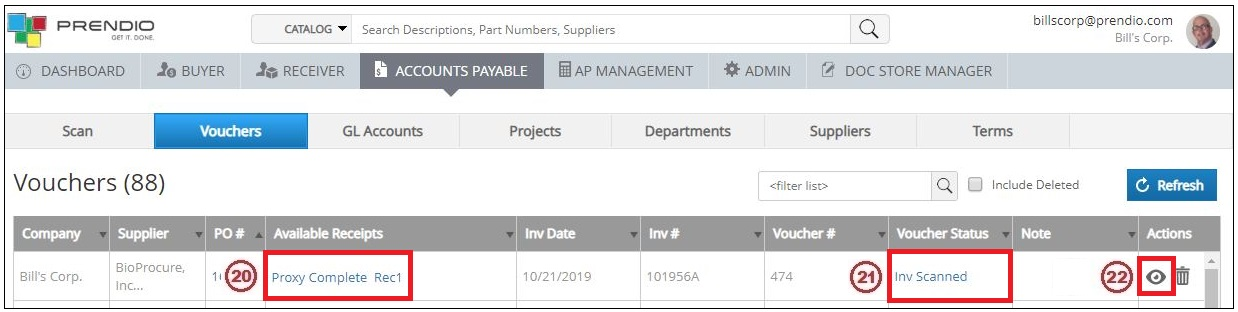
20. Available Receipts now displays Proxy Complete Rec1.
21. The Voucher Status is Inv Scanned.
22. Press the View (eyeball icon) to create the voucher.
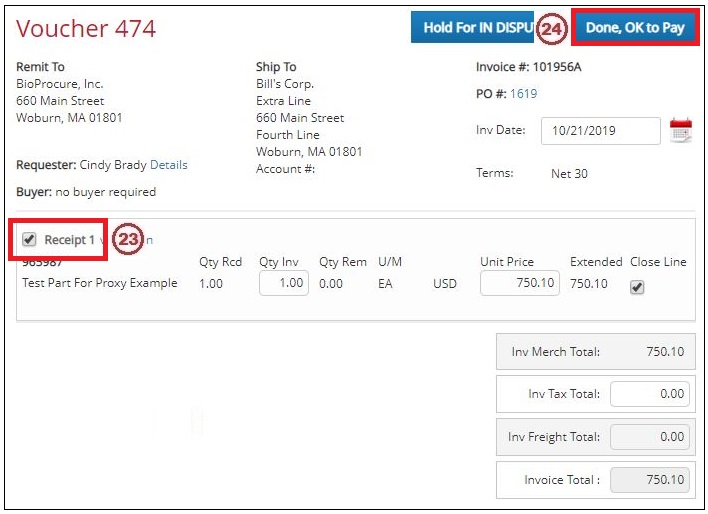
23. Check the Receipt box.
24. Press Done, OK to Pay.
AP Management > AP Push:
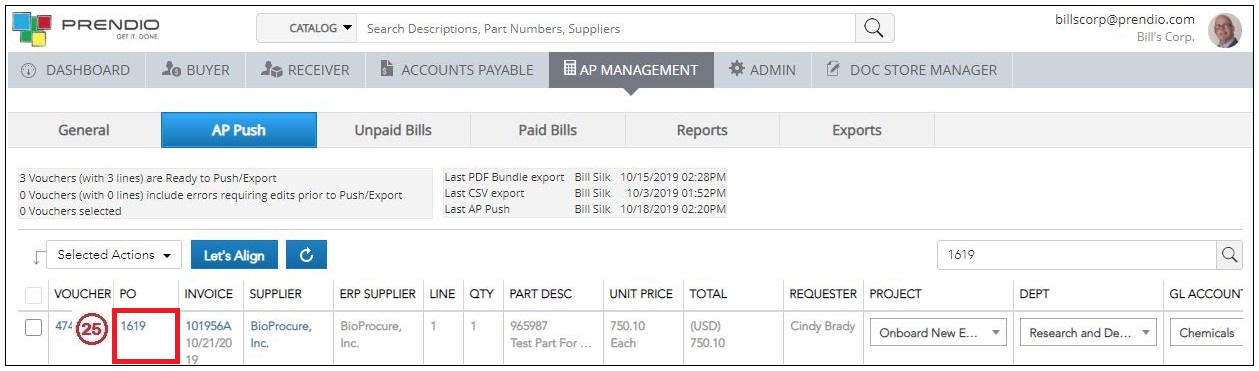
The order is ready to be pushed.