
The Company Admin should know ahead of time the details of the user to be added (i.e. email address, phone number, Prendio Roles to be assigned, Spending Limit, Approval Limit, Approvers, Approval Delegate, Departments and Projects the user needs access to, etc.).
Admin > Users:

1. Press the Add User Button.
General Tab:
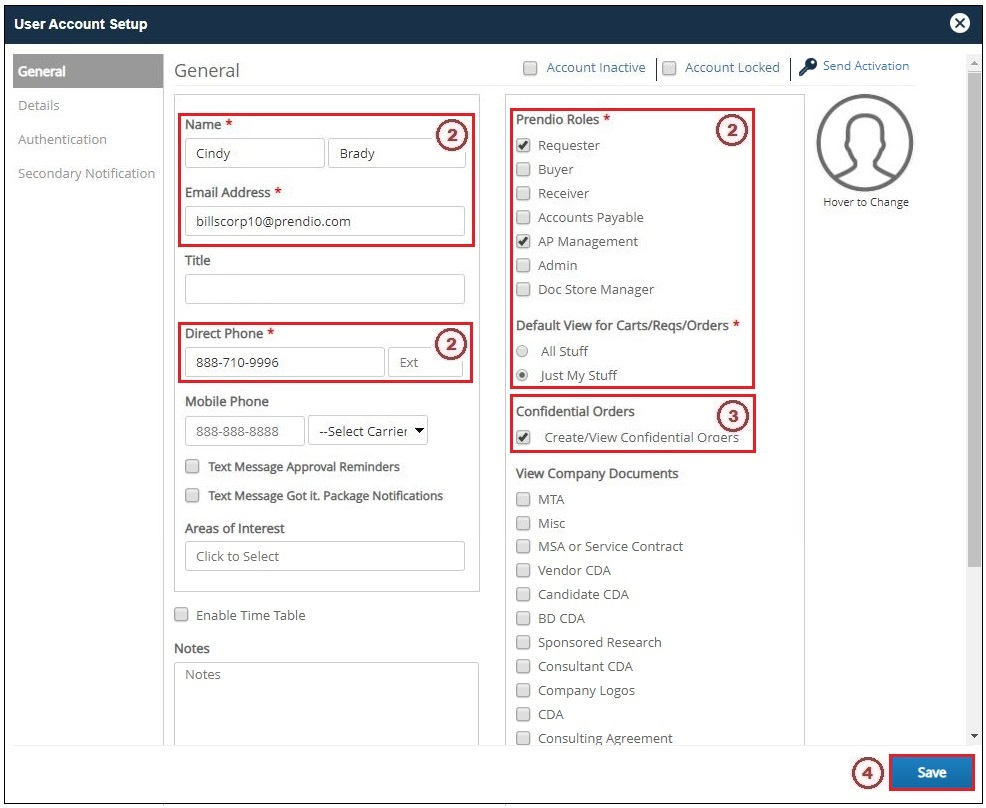
2. These Mandatory Fields must be completed. The fields that do not have a Red Asterisk (*) are not mandatory and may be useful to your company.
3. Create/View Confidential Orders must be selected if this user is to have access to view and/or Confidential Orders.
4. Press Save when complete.
Details Tab:
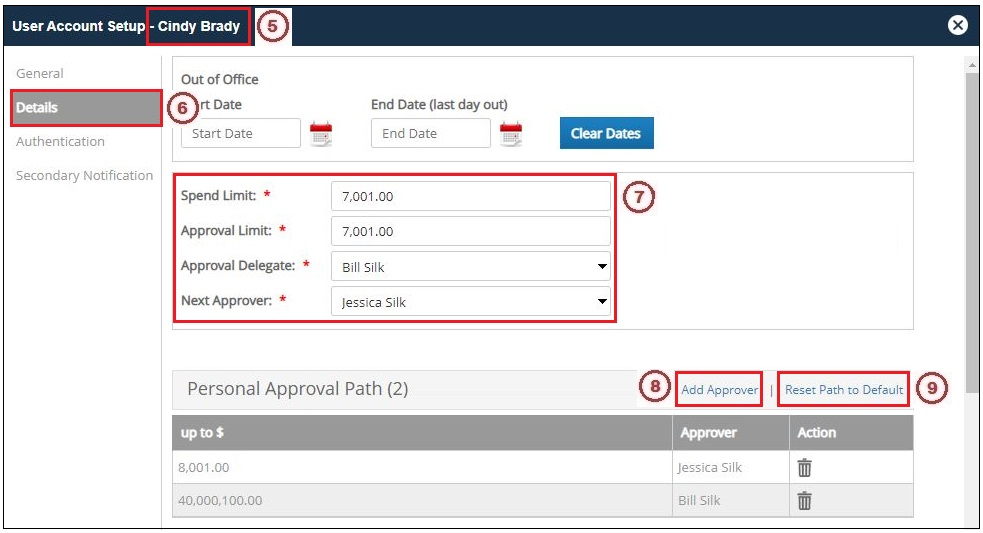
5. Pressing Save added the User's Name to the Prendio User Profile.
6. Select Details.
7. The user's Spend Limit, Approval Limit, Approval Delegate, and Next Approver must be selected.
Note: Clicking in the Approval Delegate and Next Approver pulldown menus will display a list of Prendio users to select from.
8. Click on Add Approver to display a list of Prendio Users to manually select as Approvers to add to the user's Personal Approval Path.
- or -
9. Click on Reset Path to Default for Prendio to automatically add the Approvers to the Personal Approval Path.
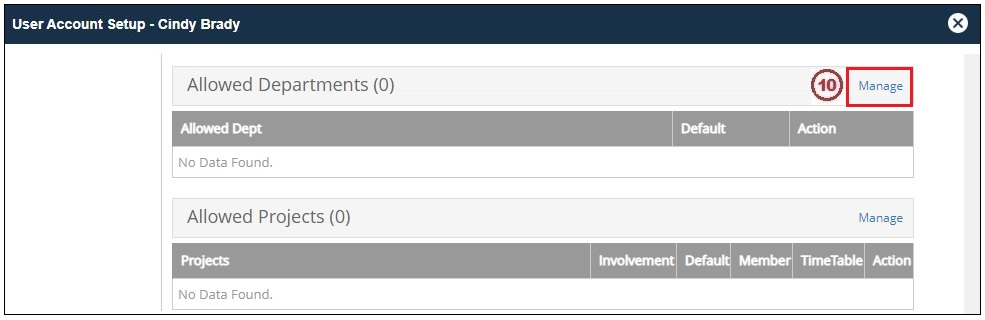
10. In the Allowed Departments header click on Manage.
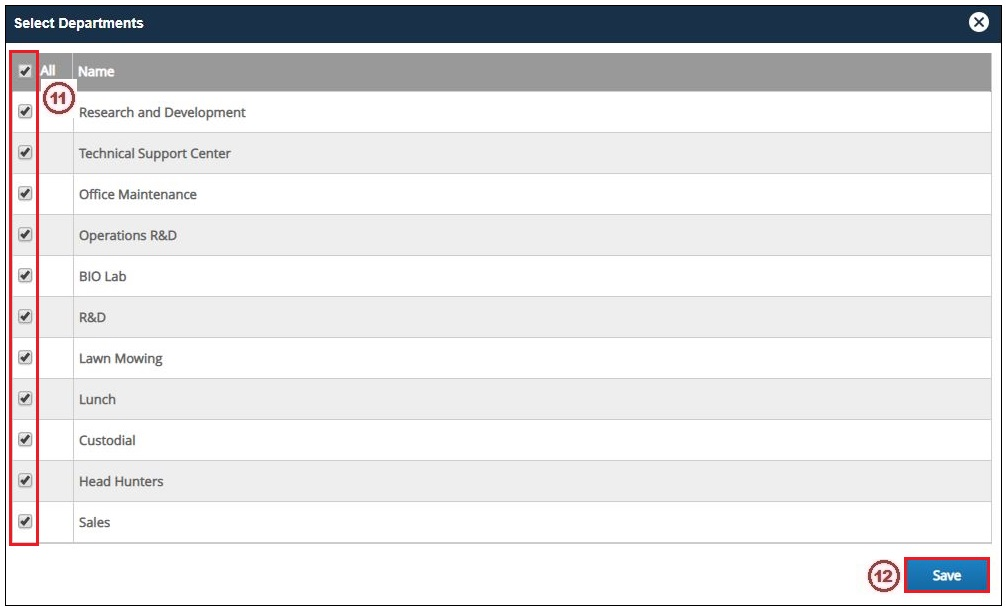
11. Check the box next to All to add the user as a member to all departments or manually select the department(s) the user should be a member of.
12. Press Save when complete.
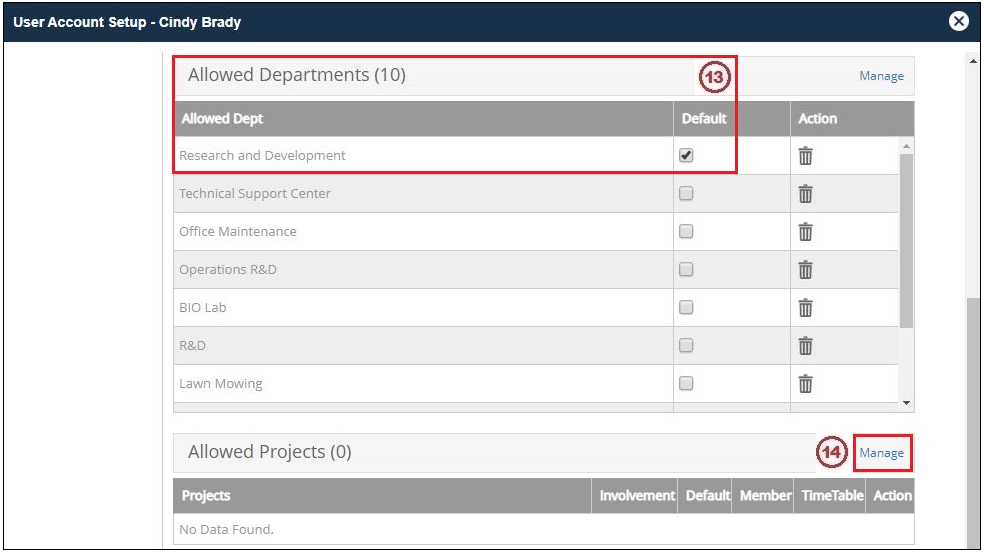
13. The Allowed Departments field now displays the number of departments this user is a member of. A department can also be selected as the default for the user.
Note: The Default Department will automatically be selected when the user creates a new cart.
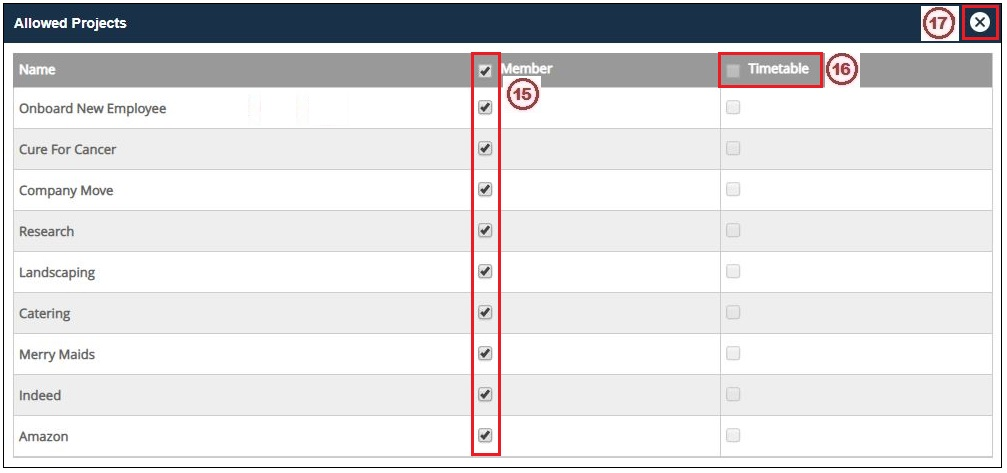
15. Check the box next to All to add the user as a member to all projects or manually select the project(s) the user should be a member of.
16. Note: Timetable is an option in Prendio that the users can post the times spent on projects. If your company has this option check the box under Timetable next to the Project(s) that should be available for time tracking.
17. Click on the X in the upper right-hand corner to close this window when complete.
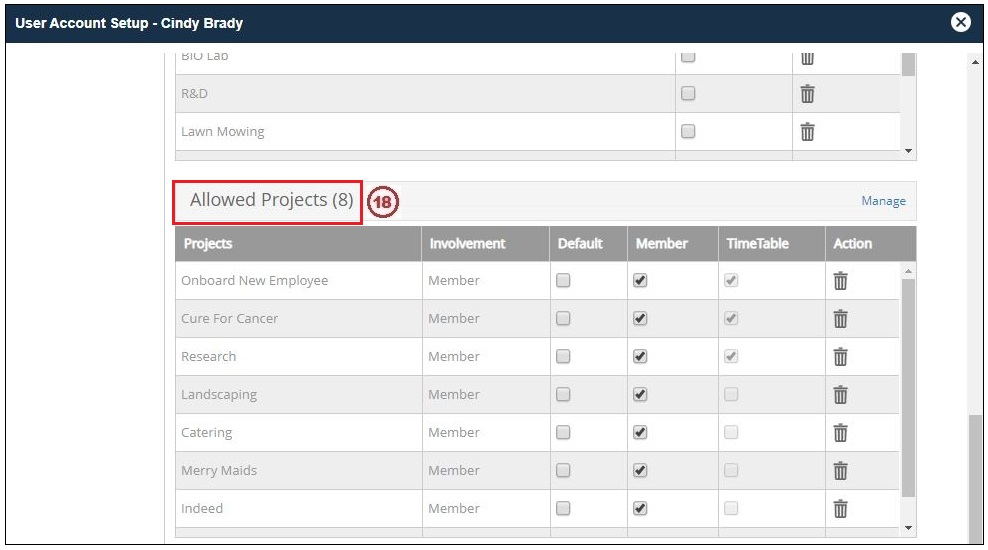
18. The Allowed Projects field now displays the number of projects this user is a member of.
Back To The General Tab:
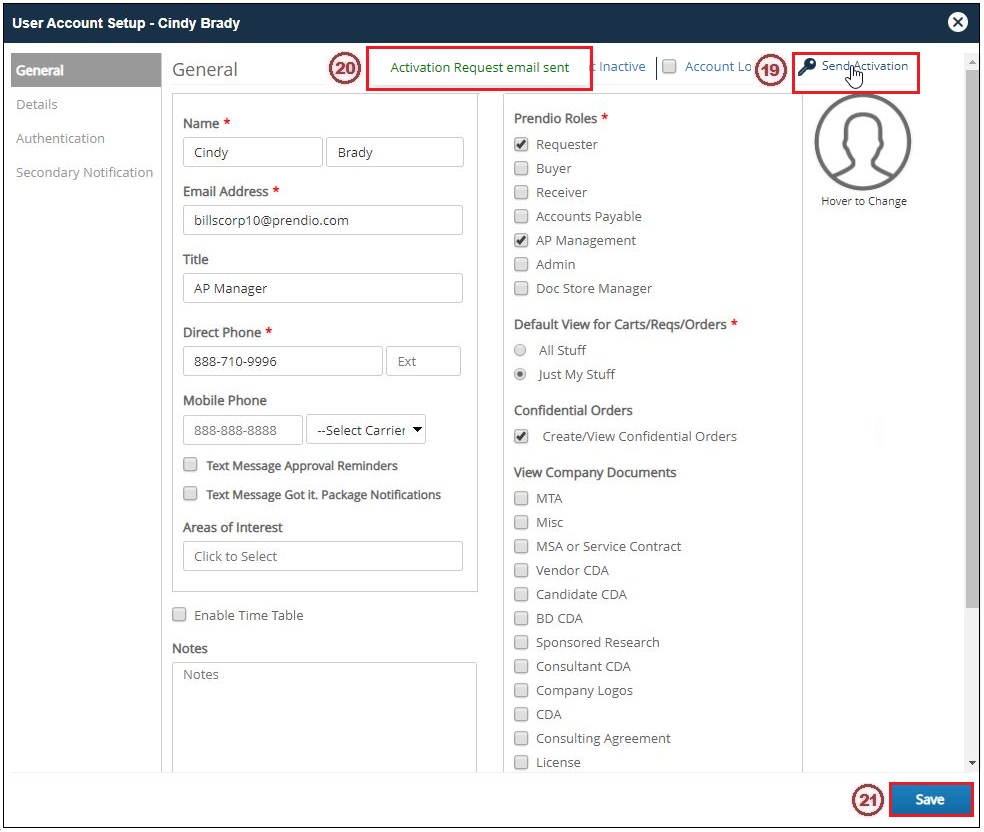
19. Click on Send Activation to send an email to the user that contains a link for the user to Activate their profile.
20. Activation Request email sent will appear briefly.
21. Press Save when complete.
Admin > Users:
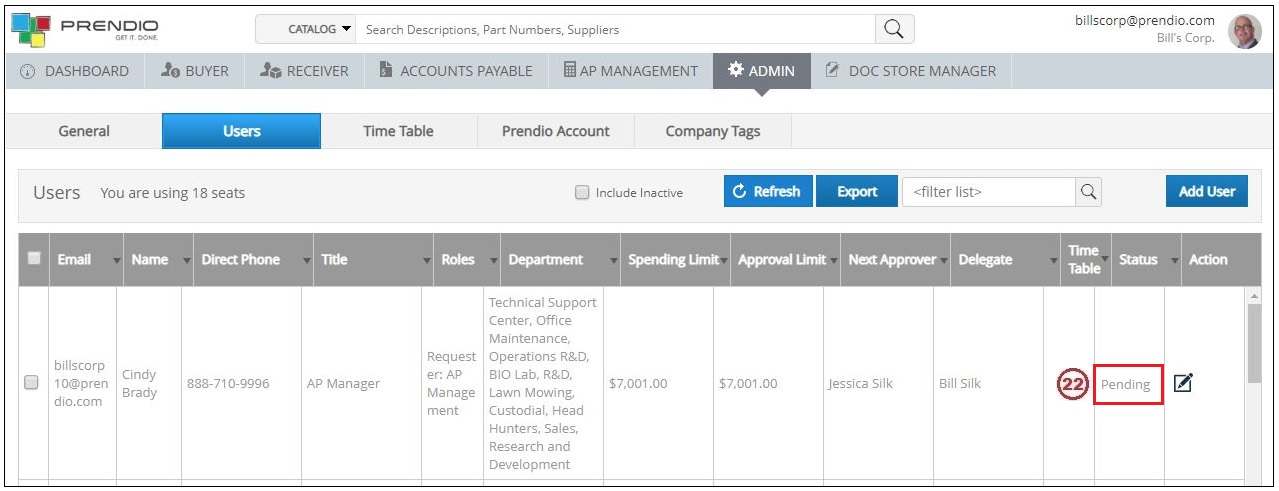
22. Cindy Brady's Prendio User Profile is now in a Pending status. After Cindy responds to the Activation Request, the status will change to Active.
Additional Information:
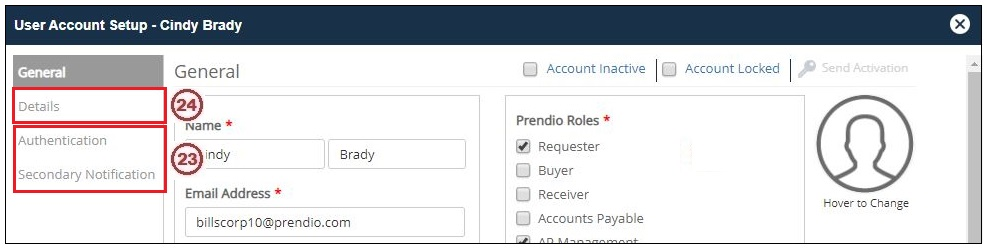
23. The Authentication tab is used to specify if the user is using Prendio or SSO (Single Sign-On) Authentication, the default is Prendio Authentication. The Secondary Notification tab is used to configure the user's Slack username.
Notes: SSO Authentication and Slack Integration are options, please contact Prendio Technical Support for more detail.
24. Click on the Details tab.
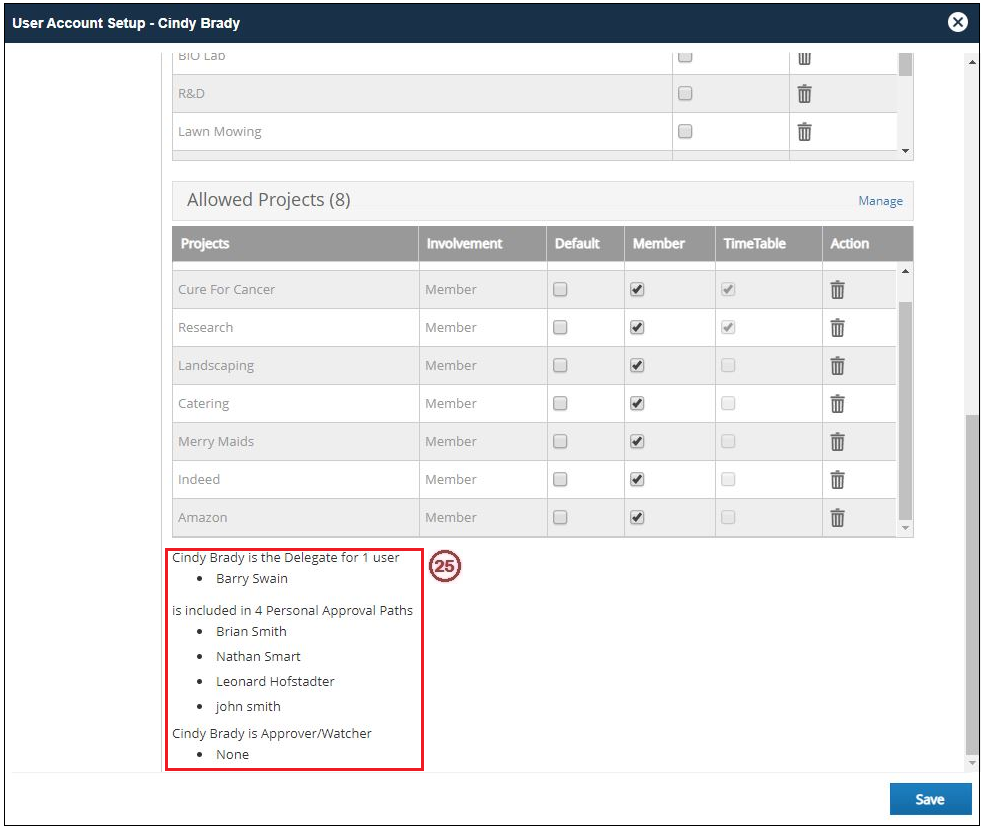
25. A summary of the user's Delegate, Approval Path, and Watcher responsibilities is included at the bottom of the Details tab.
Select the General tab.
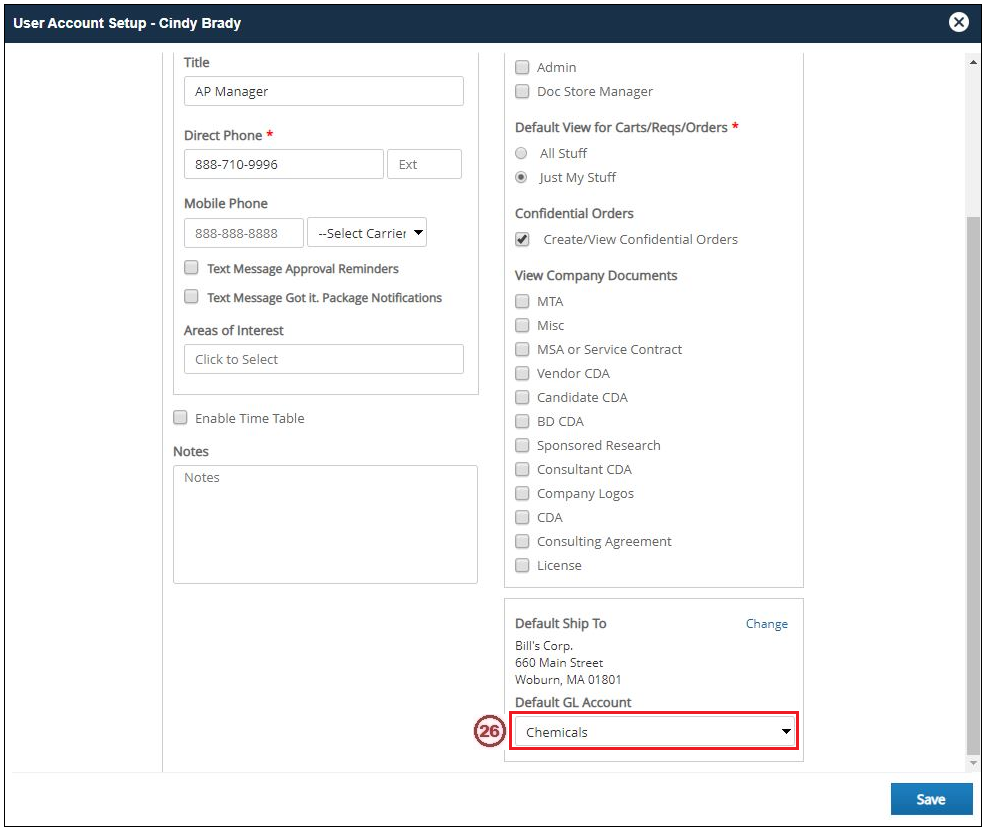
26. A Default GL Account can also be selected for the user.
Note: The Default GL Account will automatically be selected when the user creates a new cart.