
About This Document:
This document provides the steps to follow when creating a Centrify Application for use with Prendio SSO (Single Sign-On).
This document provides the steps to follow when creating a Centrify Application for use with Prendio SSO (Single Sign-On).
1. From the Centrify Admin Portal, go to [Apps > Add Web Apps]
2. Go to the Custom tab and click the Add button for "SAML" in the list. Confirm.

3. Provide the required information in the Settings section for the app, including a Name and Category.
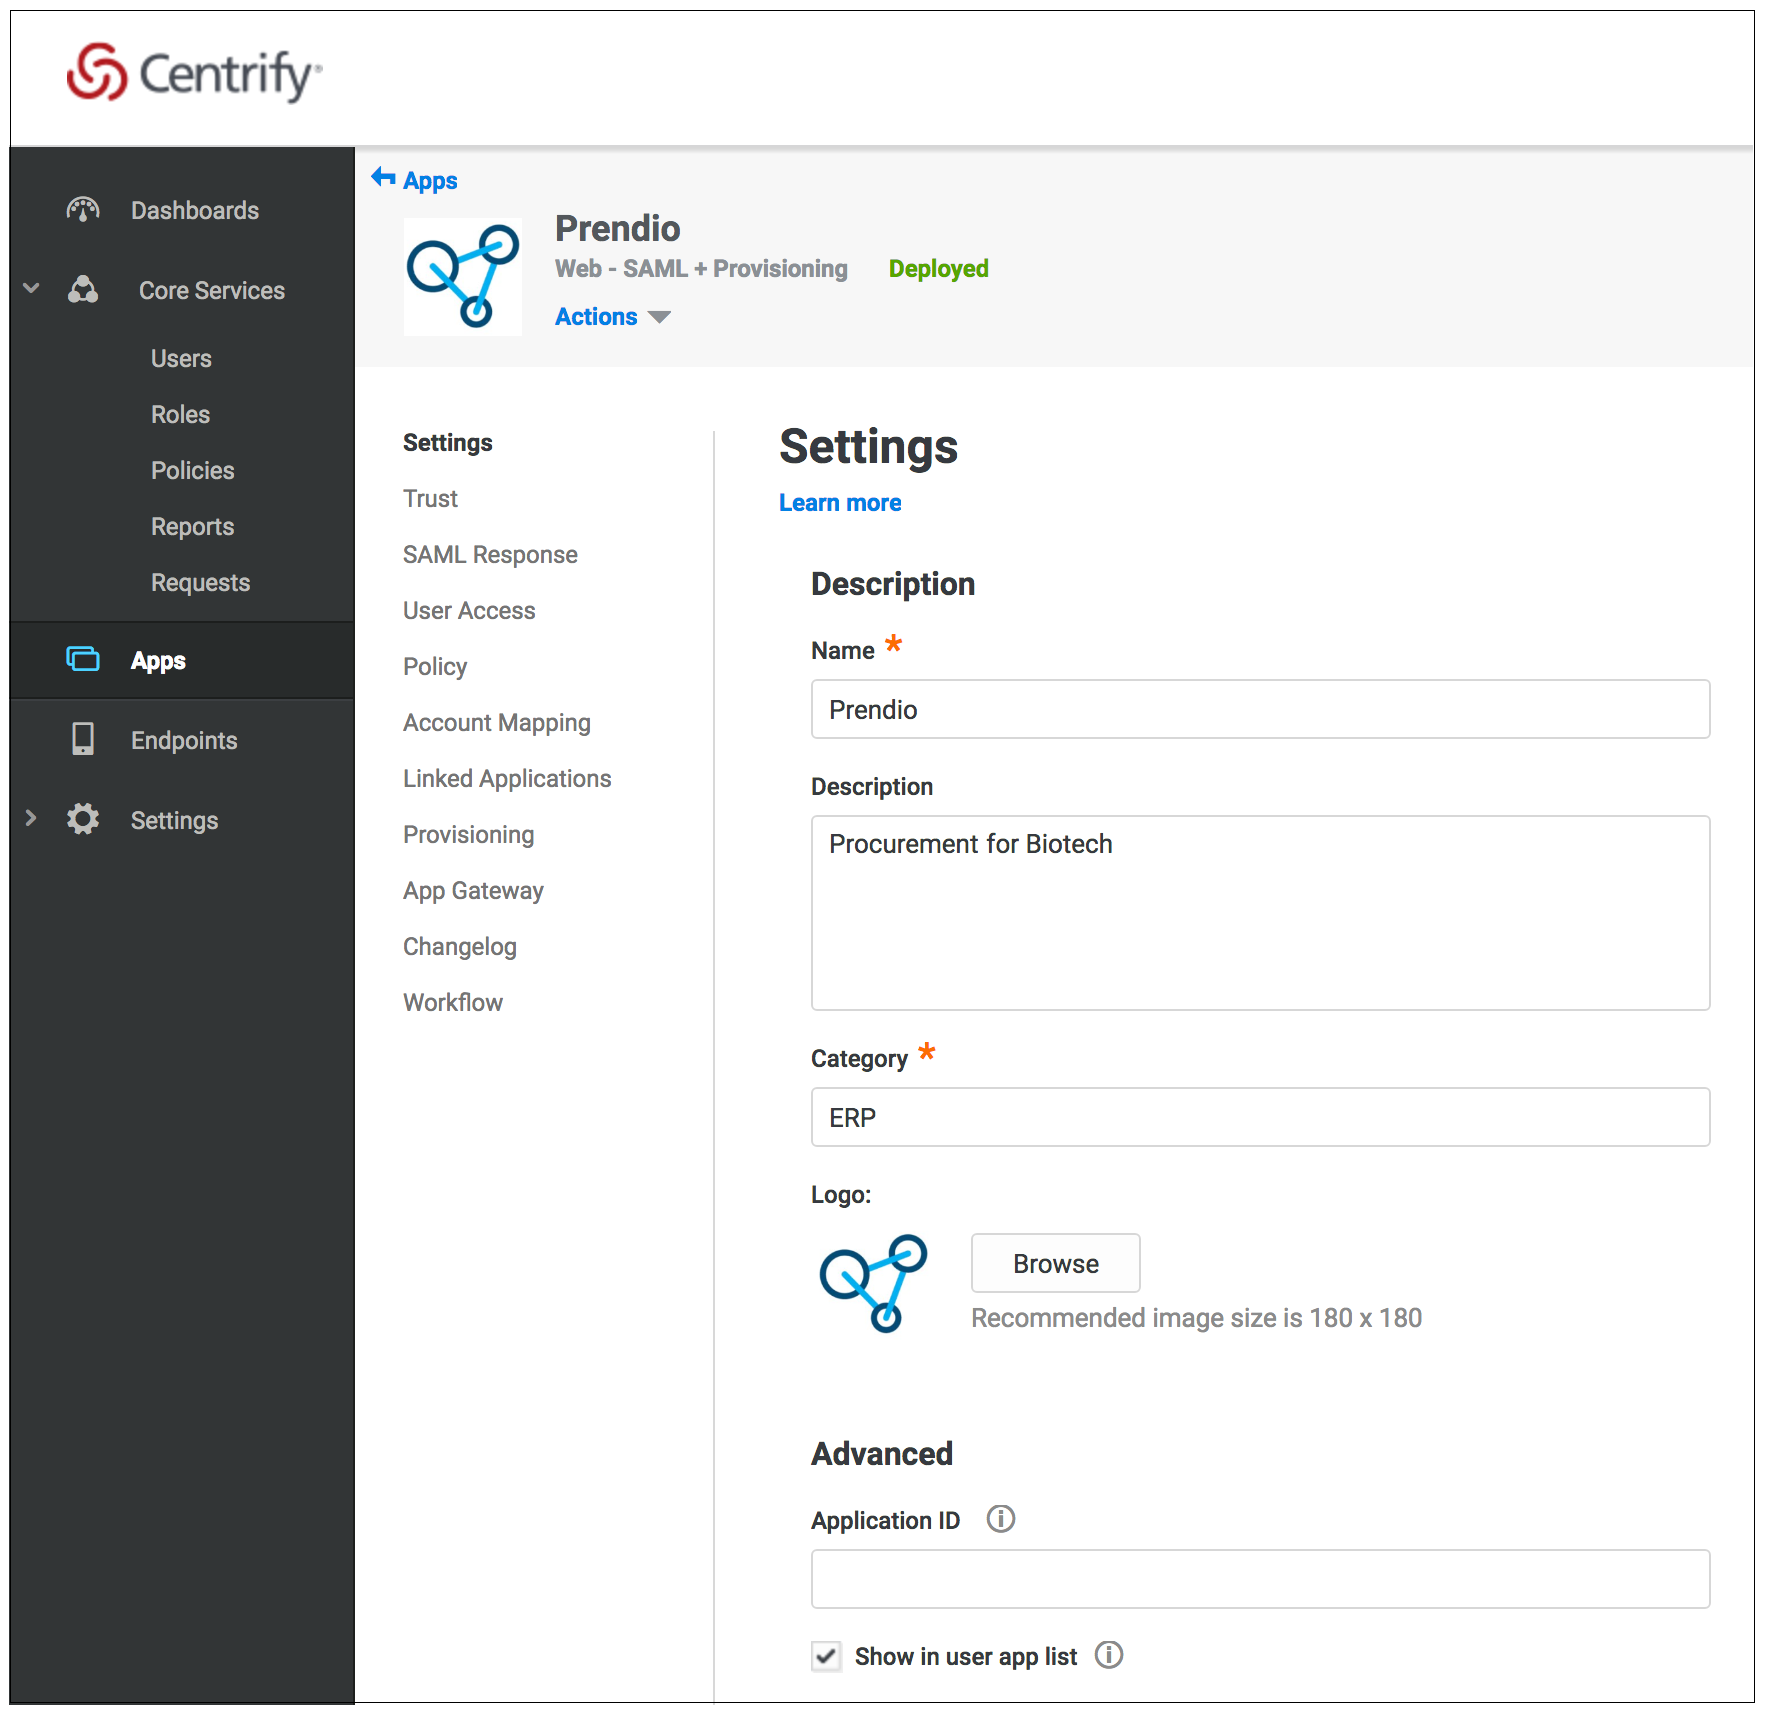
This image can be used as the logo:

You must check the Show in user app list option for Prendio to be available for one-click access in the Centrify user portal
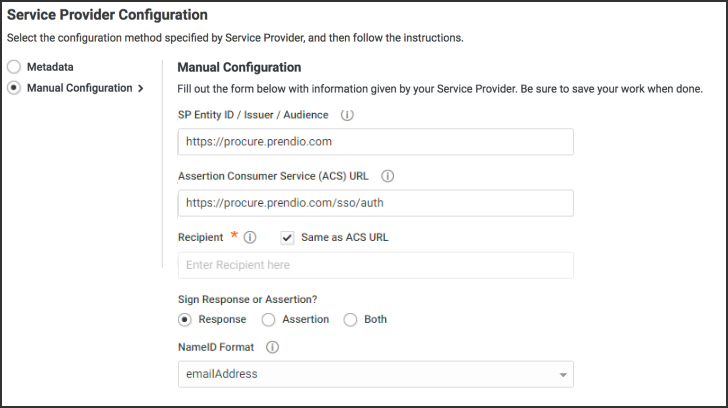
4. Configure the Trust section for the app.
- In the Service Provider Configuration section, select the Manual Configuration option and configure these fields:
- SP Entity ID / Issuer / Audience: https://procure.prendio.com
- Assertion Consumer Service (ACS) URL: https://procure.prendio.com/sso/auth
- Recipient: Click the Same as ACS URL checkbox
- Sign Response or Assertion?: Response
- NameID Format: emailAddress
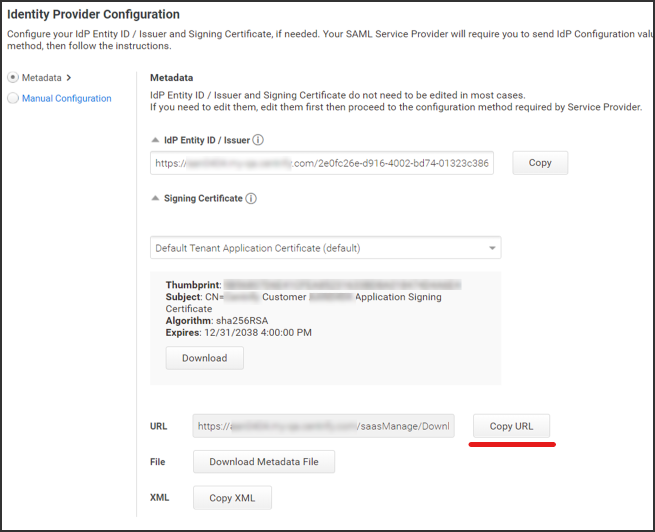
- In the Identify Provider Configuration section, select Metadata option.
- Click the Copy URL button for the URL field. You can use this as the SAML Metadata URL that auto-completes configuration information while setting up SSO for Prendio.
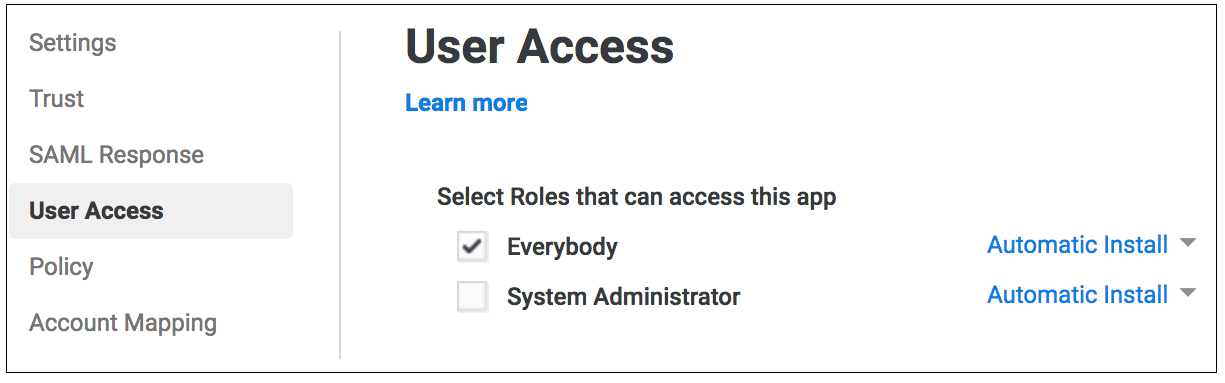
5. In the User Access section of the app, check "Everybody" for Roles that can access this app.
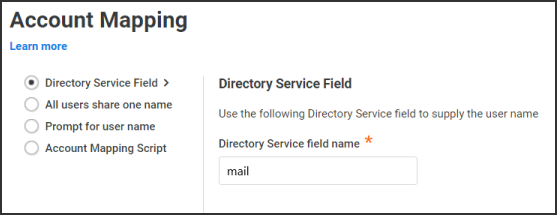
6. In the Account Mapping section of the app, select the Directory Service Field option and use "mail" for Directory Service field name.
With the application ready to go, you can take the Metadata URL and complete the steps in the Configuring Prendio With Centrify Single Sign-On (SSO) Authentication help doc.