
Note: If a GL Account, Project, or Department does not exist in QBD these must first be synchronized in Accounts Payable to add these to Prendio.
Launching The QBWC:
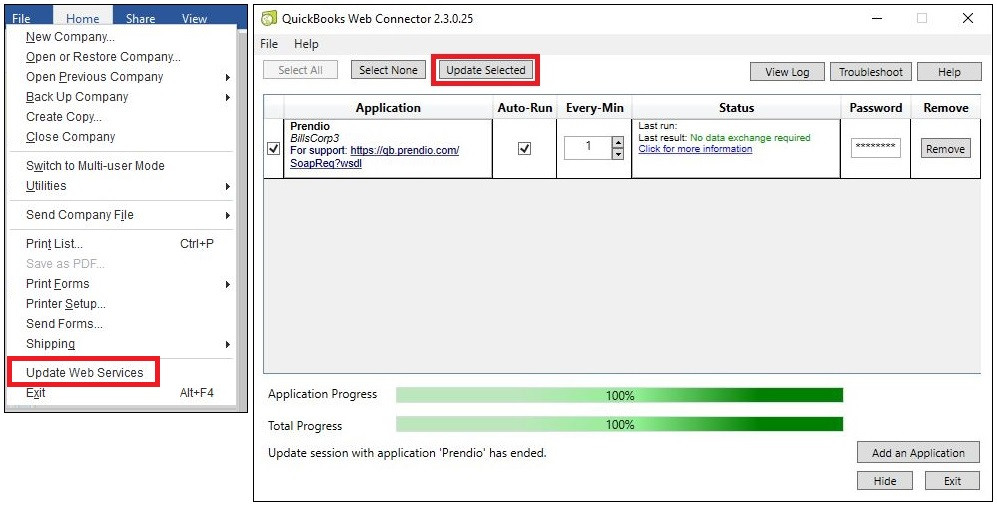
From the File pulldown menu in QBD select Update Web Services to launch the QBWC.
Helpful Hint: During the connection between Prendio and QBD there may be times when the systems are waiting for an exchange of information. Pressing the Update Selected button in the QBWC will continue the exchange of information when the systems are waiting.
AP Management > AP Push:
Note: This is a worse case example because the Supplier, Project, Department, and GL Account all need to be mapped.
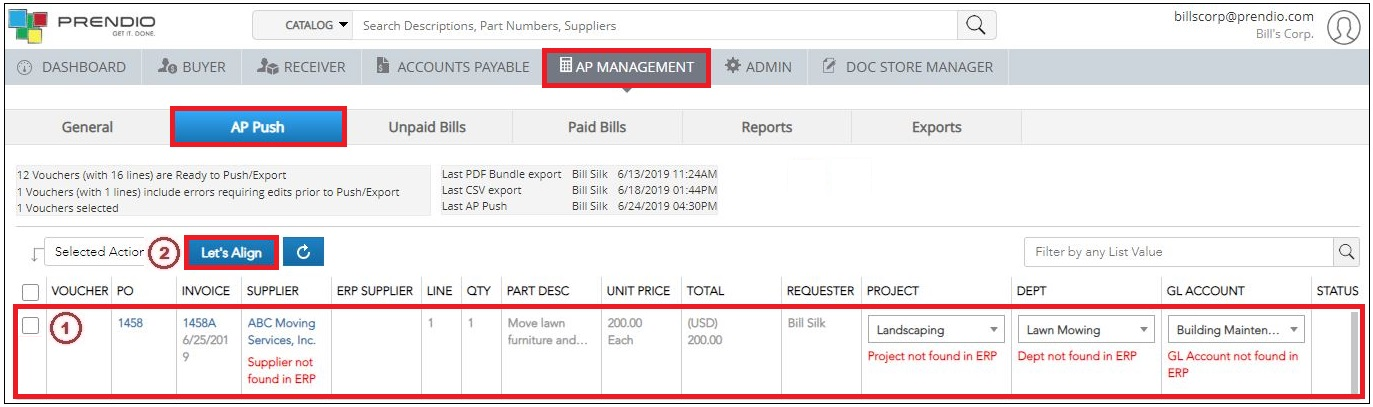
1. You need not Check the box next to the Voucher, Prendio will locate all issues that need alignment. Align.
2. Press Let's Align.
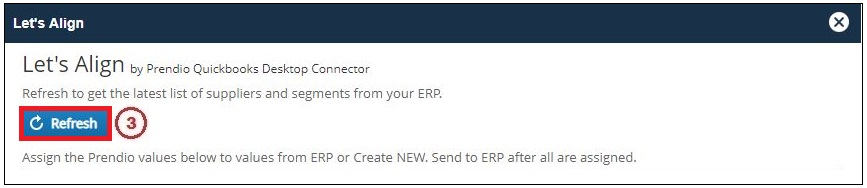
3. In the Let's Align window press Refresh.
4. The Let's Align window will then display the fields that require mapping.
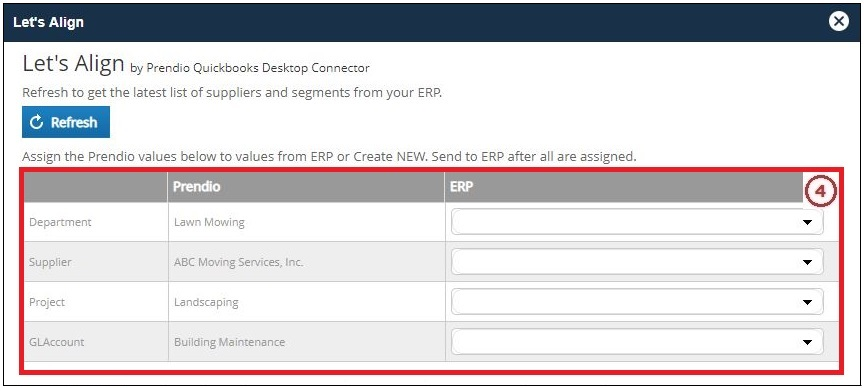
Department:
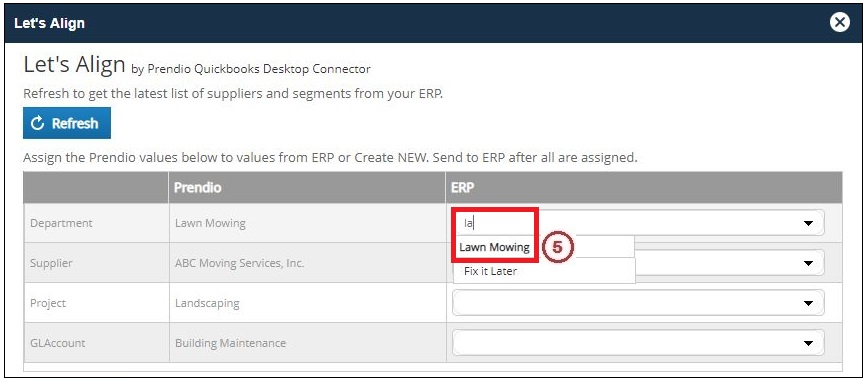
5. In the ERP column for Department start typing the name of the department until its is recognized, then select the Department Name. In this example Lawn Mowing is selected.
Note: If an ERP Name for this Department was not available in QBD Fix It Later would be selected.
Supplier:
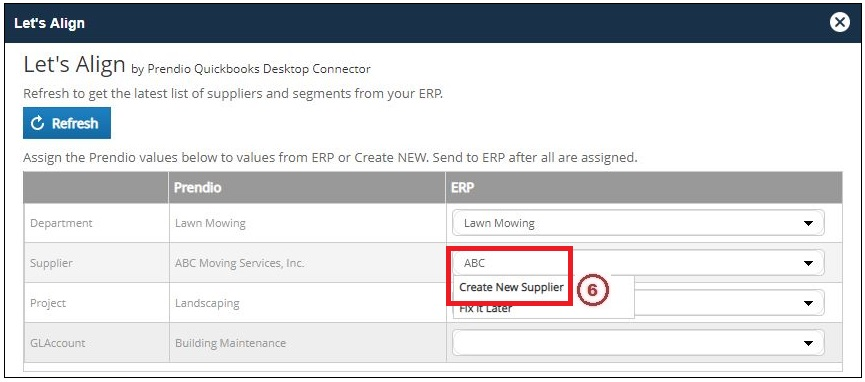
6. In the ERP column for Supplier start typing the name of the supplier until its is recognized. In this example the supplier was not found in QBD so Create New Supplier is pressed. This will create this supplier in QBD.
Project:
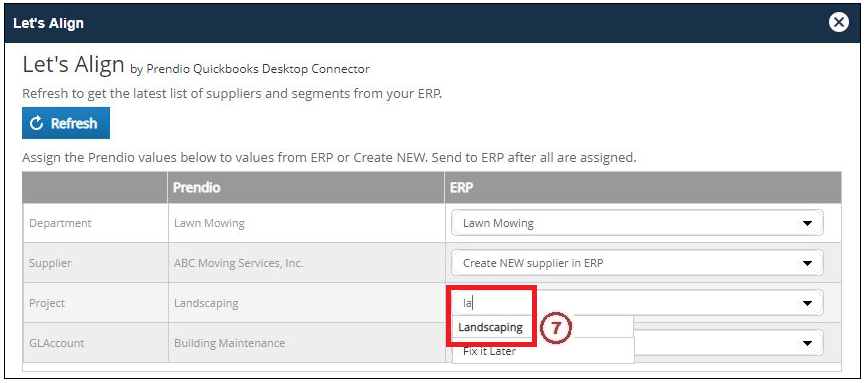
7. In the ERP column for Project start typing the name of the supplier until its is recognized, then select the Project Name. In this example Landscaping is selected.
Note: If an ERP Name for this Project was not available in QBD Fix It Later would be selected.
GL Account:
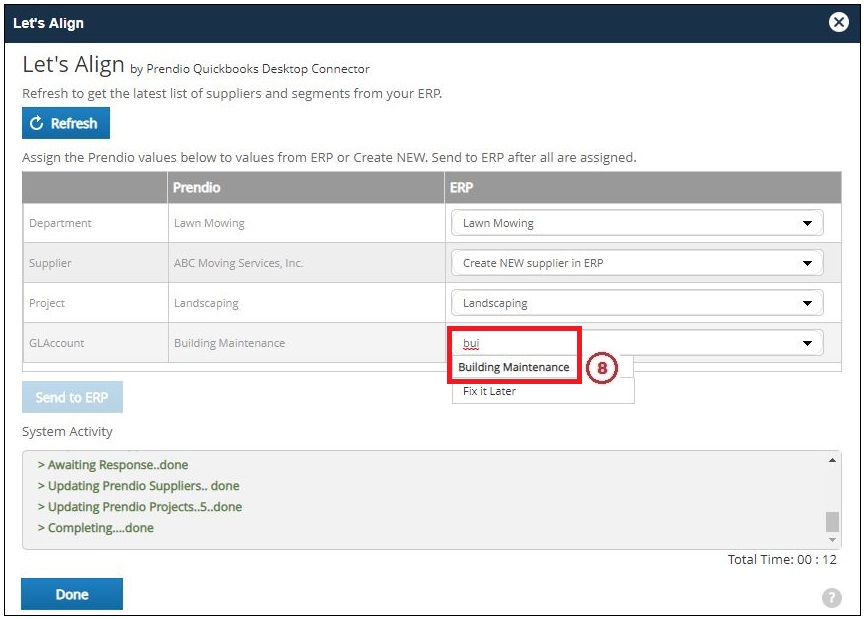
8. In the ERP column for GL Account start typing the name of the GL Account until its is recognized, then select the GL Account Name. In this example Building Maintenance is selected.
Note: If an ERP Name for this GL Account was not available in QBD Fix It Later would be selected.
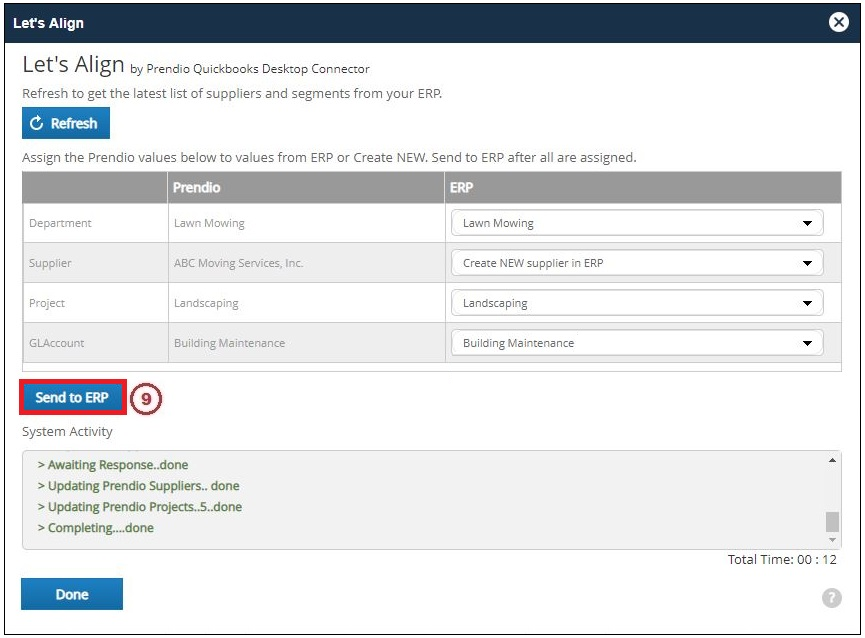
9. Now that all of the mapping is complete, press Send to ERP. The Let's Align window will close on it's own when this step is complete.
Ready To Push:

This voucher now has a green check in the Status column and is ready to be pushed.