
About This Document
This document details the Admin >
General > Accounting Setup.
Prerequisites
The Prendio Admin role is
required. User roles are assigned by a Company Admin.
Note: This setup
window is also available in AP Management > General Accounting and the
changes are best made there.
Admin > General > Accounting
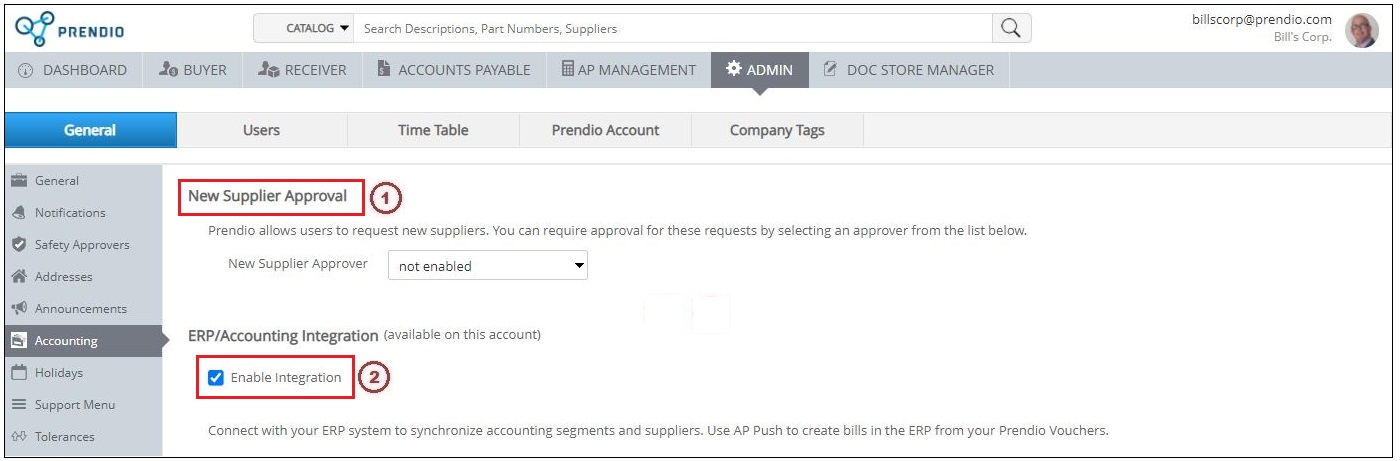
1. New
Supplier Approval can be enabled.
To enable this feature click
in the New Supplier Approver pulldown menu to select
a Prendio User from the list.
Once enabled, that user will need
to approve any new supplier requests
for your company.
2. Enable ERP
Integration This feature is not selected by default. When not
enabled Prendio orders are Exported as CSV (comma separated values) files for manual import into the ERP System. When enabled these orders can be
pushed to the configured ERP System.
Note: The
initial ERP Integration is completed with the assistance of the Prendio Technical
Support. Please contact help@bioprocure when any changes are necessary.
ERP
Connector Setup
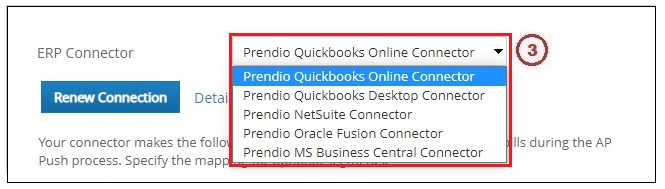
The
available selections are Prendio Quickbooks Online Connector, Prendio
Quickbooks Desktop Connector, Prendio NetSuite
Connector, Prendio Oracle Fusion Connector and Prendio MS Business Central
Connector.
All
of these selections communicate website to website (online connector) with
the exception of Quickbooks Desktop.
Note: Quickbooks Online will be used in this example.
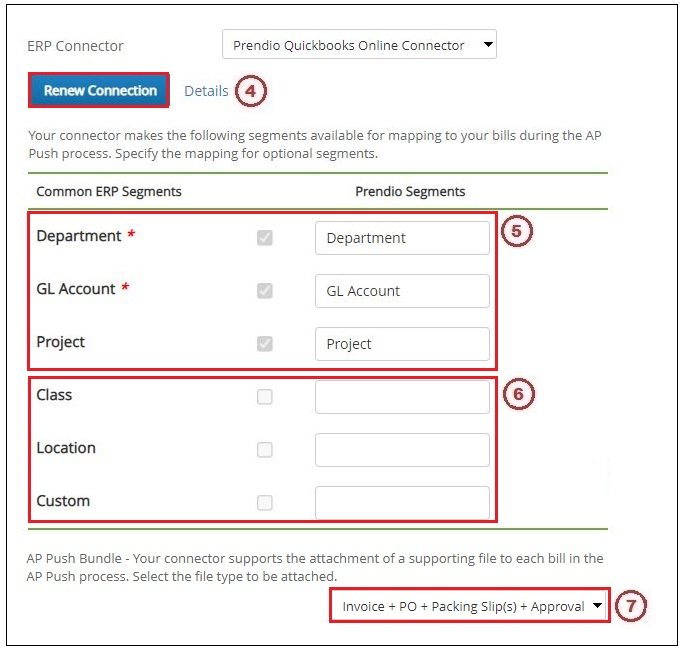
4. The Renew
Connection button is used to re-establish
communication between the Prendio and Quickbooks secure websites.
Prendio
Flexible Segments:
Common ERP
Segments are how the Segments are named internally in Prendio. These names
cannot be modified.
Prendio
Segments are how the Segments are named in the Prendio User Interface (examples:
Carts, Accounts Payable and AP Push).
5. The
default names are used here. These can be changed to
match the ERP Naming.
6. These are Optional
Segments and can only be enabled with
the assistance of Prendio Technical Support. Please contact help@bioprocure
when any changes are necessary.
7. With the Prendio online connectors an AP Push Bundle can be selected. This will attach
the document(s) in PDF format to the orders and these bundles will be pushed to
these ERP Systems.
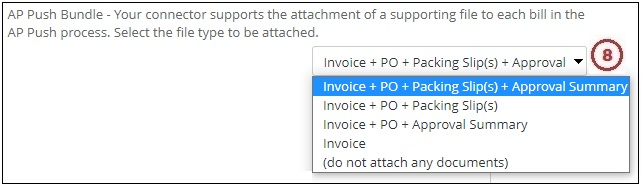
8. The documentation selections available display
in the AP Push Bundle pulldown menu. The selections are Invoice + PO +
Packing Slip(s) + Approval Summary, Invoice
+ PO + Packing Slip(s), Invoice + PO + Approval Summary, Invoice,
and (do not attach any documents).
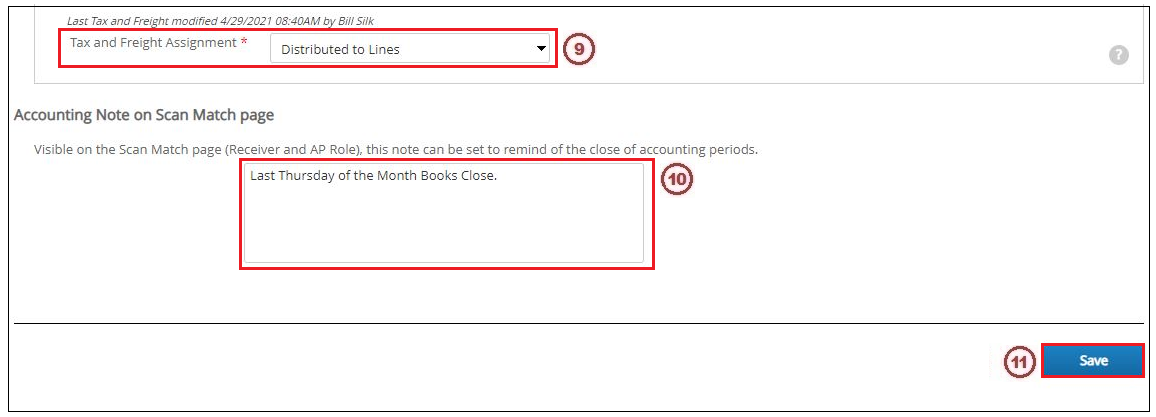
9. The Tax and Freight Assignment pulldown menu has 2 selections, Distributed to Lines and Specific
Accounts. Selecting Distributed to Lines distributes the tax and
freight between each line item in the order. Selecting Specific Accounts allows
the Tax and Freight to be assigned individually to a GL Account.
10. An Accounting Note can be entered
here. The note entered here will appear in the Scan Match window for the
Receiver and Accounts Payable roles.
11. Press Save when the configuration is complete.