
Introduction
When using Prendio you are working with two companies. You
are working with Prendio, the Software manufacturer, and BioProcure, your
Service Provider. BioProcure also uses Prendio.
Help Requests

On the Prendio Dashboard below the
Support Heading is a Link to Help with Orders. This will create an Email
Message to help@bioprocure.com. Be as
descriptive as possible with your question or request so our Customer Service
Team can quickly route it to the appropriate team.
About This Document
This document details the features of the Prendio Receiver role.
Prerequisites
The Prendio Receiver role is
required. Prendio roles are assigned by a Company Admin.
Receiver > Orders:
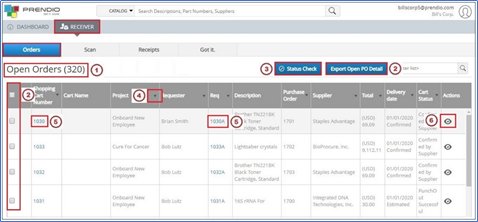
1. This
window displays the total number
of Open Orders.
2. Select the top check box to select all
orders or check
individual order(s) then press Export Open PO
Detail to export a CSV file containing
the selections.
3. After pressing Export Open PO Detail you can press Status Check to
open a window to monitor the status
of the request, and download the result when complete.
4. The column in this window include Shopping Cart Number, Cart Name, Project, Requester, Req, Description, Purchase
Order, Supplier, Total, Delivery Date, Cart Status,
and Actions. Click on the Arrowhead icon to sort the columns.
5. Click on the Cart Number link to view the cart and
the Req Number link to view Order History.
6. Click on the View icon to view the
Purchase Order.
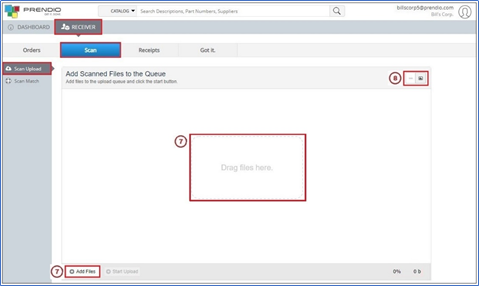
7. Either drag PDF file(s) here or press Add Files to maneuver to and
select PDF files(s).
Note: In this
example 2 PDF documents were added to the Scan Upload window.
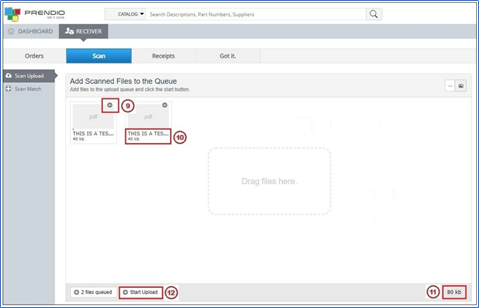
9. Click on the minus (-) icon
in the upper
right-hand corner of a thumbnail to delete it if needed.
10. The name
and size of the document display here.
11. The combined
size of the documents in this window display
here.
12. Press Start Upload to upload the PDF
file(s).
Note: In
this example Start Upload was pressed.
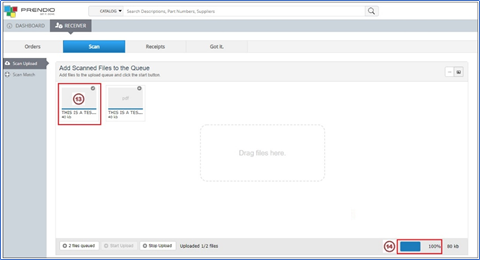
13. During the upload, a progress bar will
appear at the bottom of each
thumbnail. When the upload
is complete for that thumbnail, a checkmark will appear
in the upper right-hand corner.
14. The progress
of all of the documents being
uploaded appears here.
The Scan Match window is used to match the appropriate Packing Slip with a PO Number.
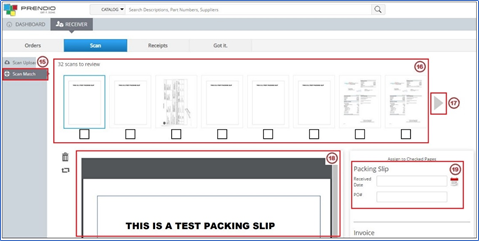
15. Scan Match is
selected.
16. The number
of scans to review appears here.
17. If there are many scans to review, arrows will
display to advance forward and
back.
18. When a thumbnail is selected,
it will display in a larger view here.
19. The Received
Date and PO# fields are
used when processing a Packing
Slip.

20. Check the box below the packing slip to be matched to the PO.
21. Select the Received Date and enter the PO Number.
22. Press Done,
Next.
Note: The
Scan Match fields detailed in Steps 20 – 24 will be grayed out if BioProcure
provides your Company’s Prendio Accounts Payable Services.
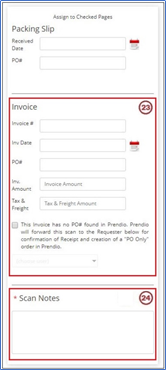
23. These fields are used when processing an Invoice, not a Packing Slip.
24. The Scan Notes field can be
used to add a note to the Packing Slip.
Receiver > Receipts:
This window is used to process Scanned Packing Slips into Receipts.
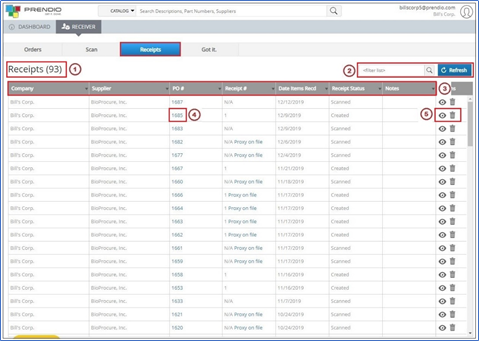
1. The Number
of Receipts is displayed here.
2. The Filter field can be used to search
for data in this window and
the Refresh button
is used to clear
the filter and display all receipts.
3. The Company, Supplier, PO #, Receipt
#, Date Items Recd, Receipt
Status, and Notes columns
can be sorted using the Arrowhead icons.
5. The View (eyeball) icon is used to view a Scanned Packing Lip and create the receipt. The Trash Can icon can
be used
to delete a Scanned Packing Slip or Receipt.
Notes:
If BioProcure provides your Company’s Prendio Accounts Payable Services, Steps
5 – 7 will be completed by BioProcure.
The links in the Receipt # column can be used to view Proxy Receipt details.
If a Packing Slip was matched, but a Receipt not yet created, Scanned will display
in the Receipt Status column.
If a Note was entered while matching a Packing Slip, it would display here.
Deleting a Packing Slip or a Receipt will return the Packing Slip to the Scan
Match window.
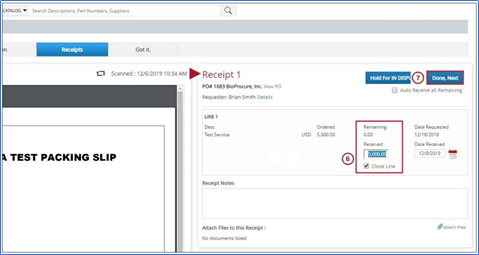
6. In the Received field an amount is
entered, Close Line is automatically
selected.
7. Press Done,
Next to create the Receipt and return to the Receipts window.
Got It can be used to send an email and a text message (if enabled for the Requester) when the Packing Slip arrived processed.
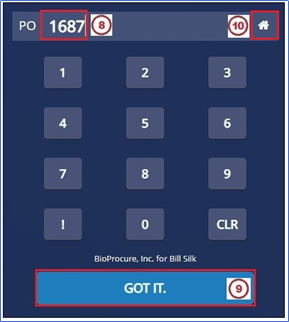
8. Enter the PO Number using the
keypad.
9. Press Got
It. to send the email message and
text message to the Requester.
10. Press the Home icon to return
to the Prendio User Interface.