
Explanation:
Note: If a Segment does not exist in the ERP System, these must first be added to the ERP System and synchronized in Accounts Payable to or a Let's Align to Map these to Prendio.
AP Management > AP Push:
Note: This is a worse case example because the Supplier, Project, Department, and GL Account all need to be mapped.
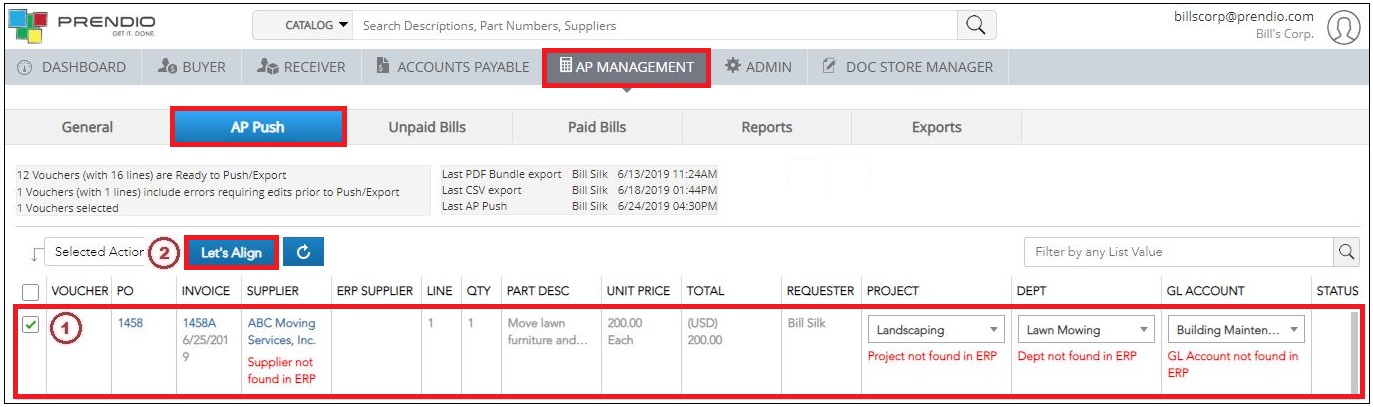
1. Check the box next to the Voucher that needs a Let's Align.
2. Press Let's Align.
Note: At this point the Prendio User will be presented with two possible scenarios. If the connection with QBO has expired the connection will need to be renewed. As detailed earlier QBO Admin Credentials are needed.
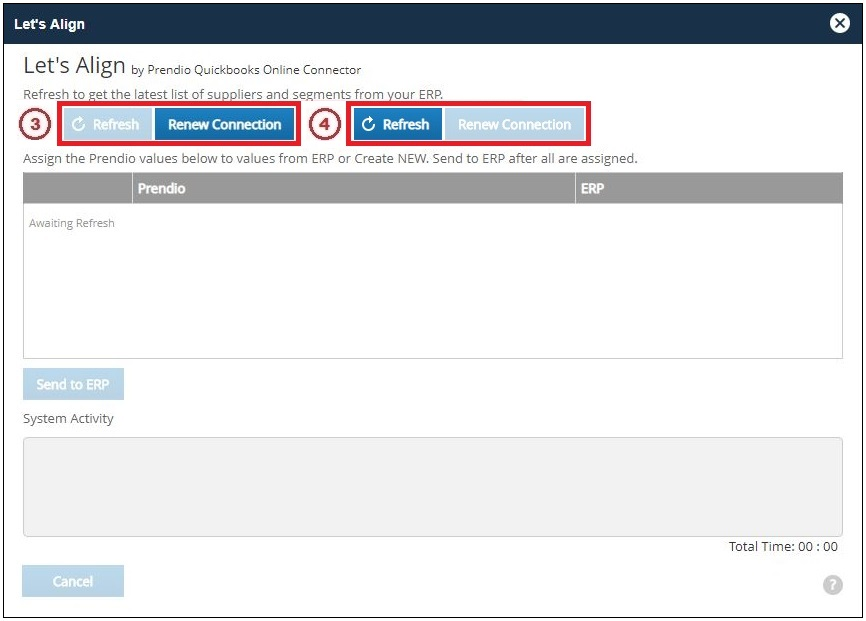
3. Note: If the Refresh button is available proceed to the next step. If the logon session has expired, the Renew Connection button will be available and the Refresh button will be grayed out. If the Renew Connection button is available, click on this button to renew the connection. When the connection is complete proceed to the next step.
4. Press Refresh to begin the alignment process.
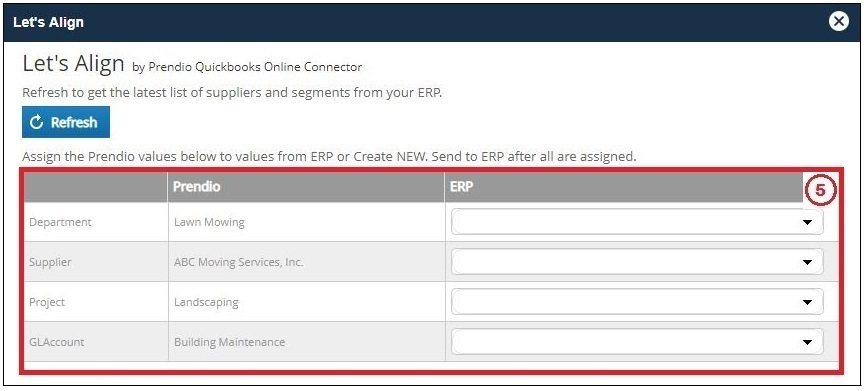
5. The Let's Align window will then display the fields that require mapping.
Department:
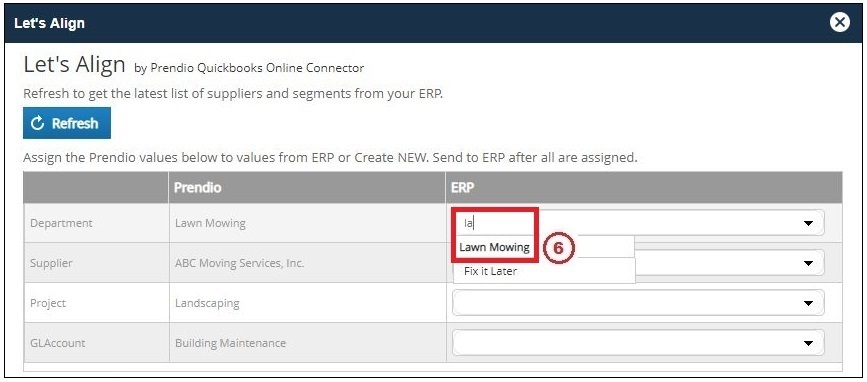
6. In the ERP column for Department start typing the name of the department until its is recognized, then select the Department Name. In this example Lawn Mowing is selected.
Note: If an ERP Name for this Department was not available in the ERP System, Fix It Later would be selected.
Supplier:
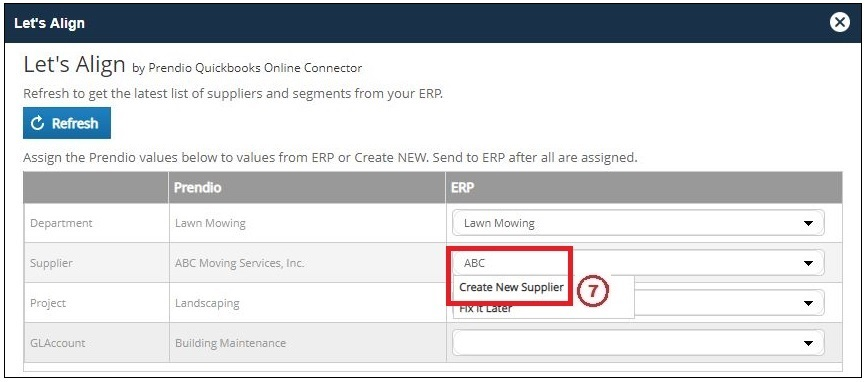
7. In the ERP column for Supplier start typing the name of the supplier until its is recognized. In this example the supplier was not found in QBO so Create New Supplier is pressed. This will create this supplier in the ERP System.
Project:
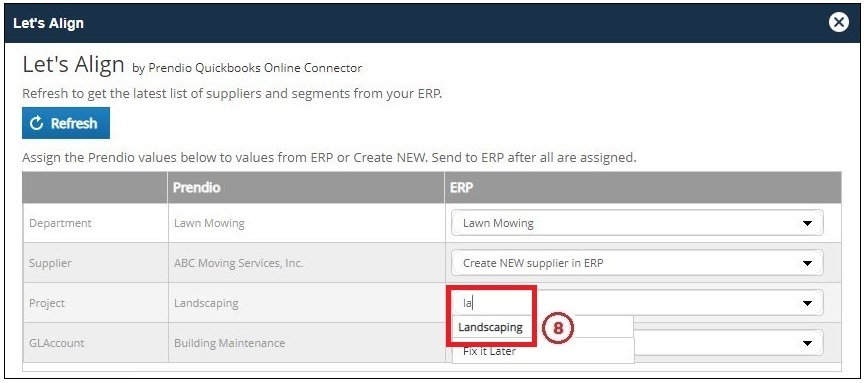
8. In the ERP column for Project start typing the name of the supplier until its is recognized, then select the Project Name. In this example Landscaping is selected.
Note: If an ERP Name for this Project was not available in the ERP System, Fix It Later would be selected.
GL Account:
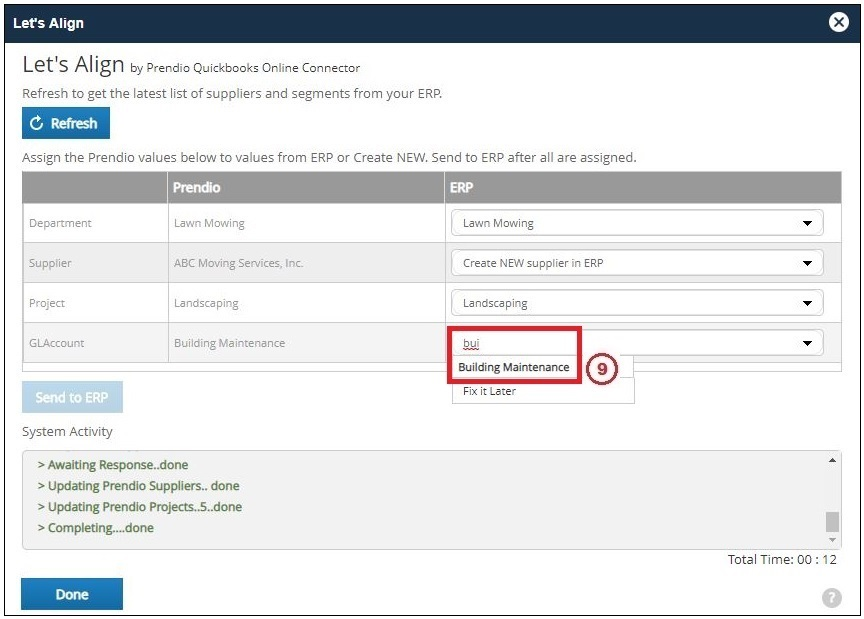
9. In the ERP column for GL Account start typing the name of the GL Account until its is recognized, then select the GL Account Name. In this example Building Maintenance is selected.
Note: If an ERP Name for this GL Account was not available in ERP System, Fix It Later would be selected.
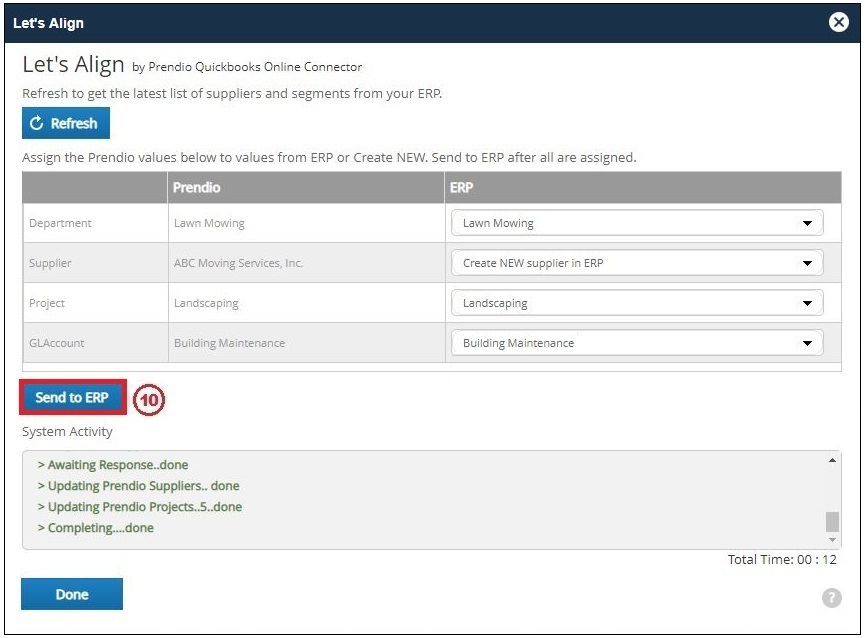
10. Now that all of the mapping is complete, press Send to ERP. The Let's Align window will close on it's own when this step is complete.
Ready To Push:
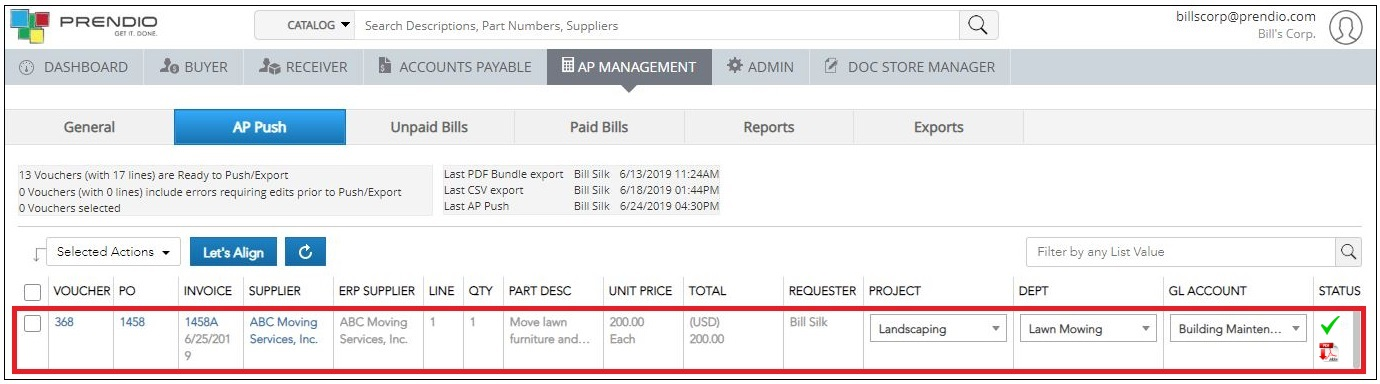
This voucher now has a green check in the Status column and is ready to be pushed.