
Launching The QBWC:
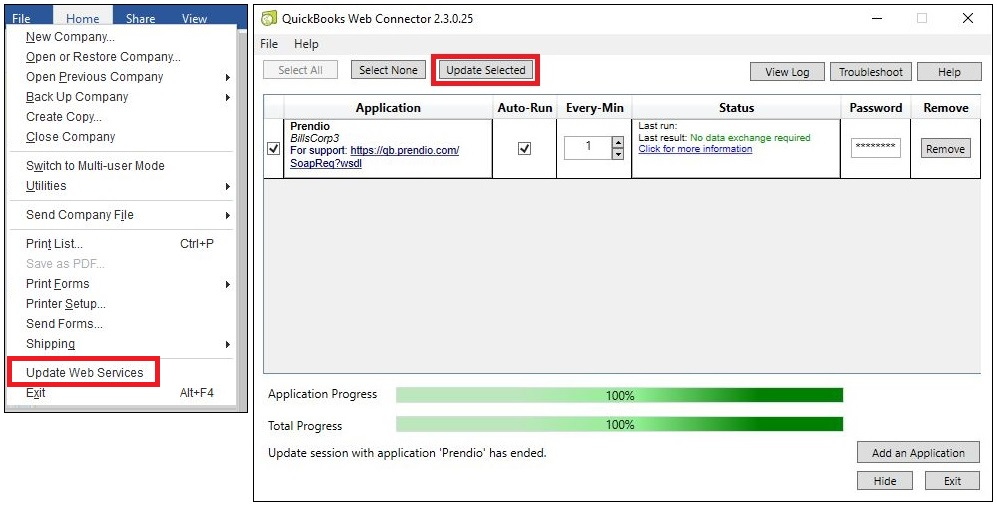
From the File pulldown menu in QBD select Update Web Services to launch the QBWC.
Helpful Hint: During the connection between Prendio and QBD there may be times when the systems are waiting for an exchange of information. Pressing the Update Selected button in the QBWC will continue the exchange of information when the systems are waiting.
AP Management > AP Push:
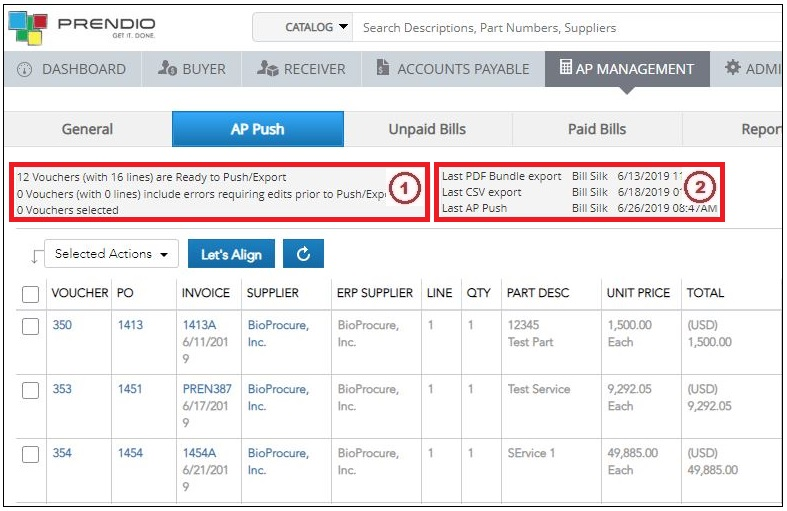
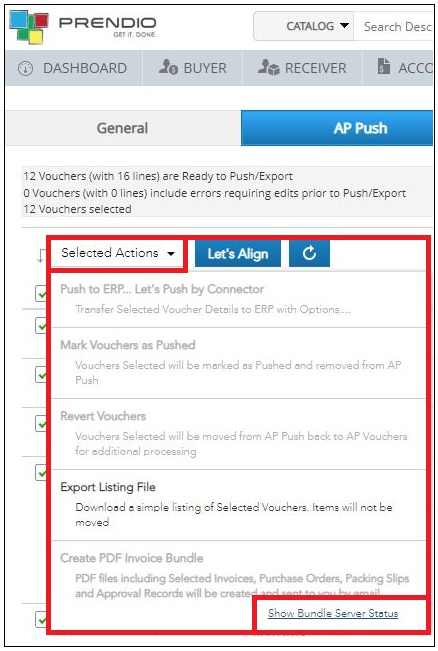
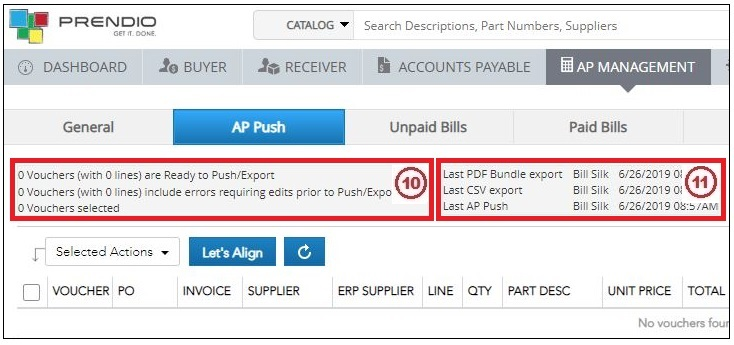
1. The AP Push window includes detail on how many vouchers are in this window as well as how many vouchers are currently selected.
2. Also included are details on the last PDF Bundle Export and when the last AP Push took place.
Optional Features Before A Push:
An Export Listing File can be created, this creates a .csv file that includes the detail on the vouchers selected in the AP Push window. This is a very convenient way to keep track of what vouchers that are about to be pushed.
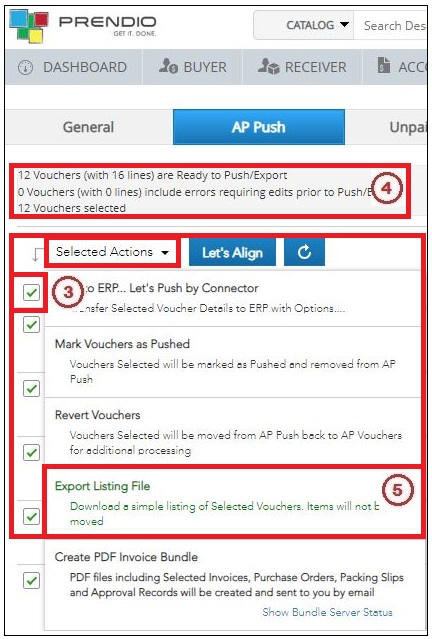
3. The top left Checkbox was checked, this selects all of the vouchers in the window.
4. The number of vouchers selected is updated.
5. Export Listing File is then selected from the Selected Actions pulldown menu.
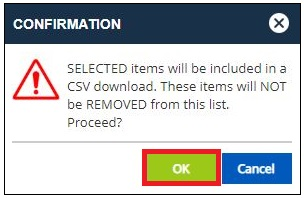
This Confirmation prompt appears explaining what will take place next, OK is pressed.
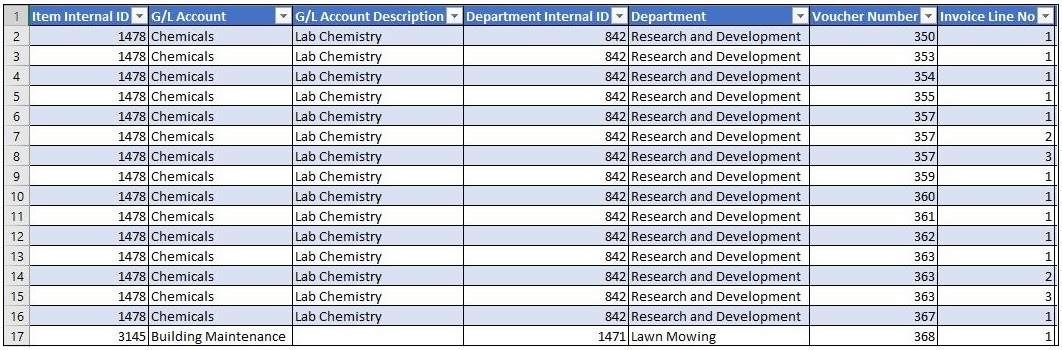
Above is a screenshot of a portion of a formatted Export Listing File.
Create PDF Invoice Bundle:
A PDF or Invoice Bundle can be created that includes PDF documents related to the selected vouchers in the AP Push window, when complete, this documentation is supplied in a compressed archive file.
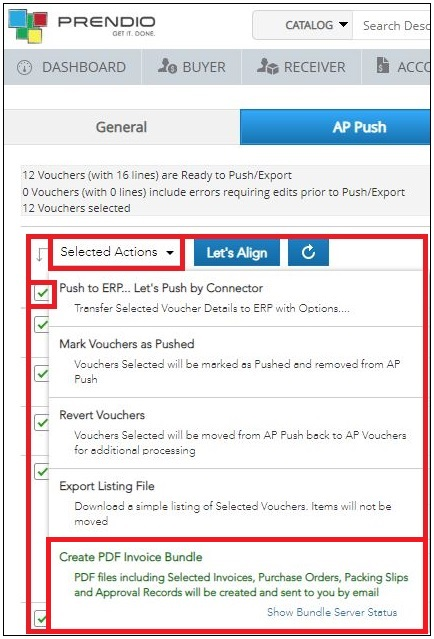
The top left Checkbox was again checked to select all of the vouchers in the window.
Create PDF Invoice Bundle is then selected from the Selected Actions pulldown menu.
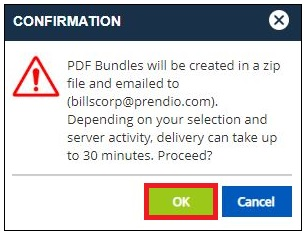
This Confirmation prompt appears explaining what will take place next, OK is pressed.
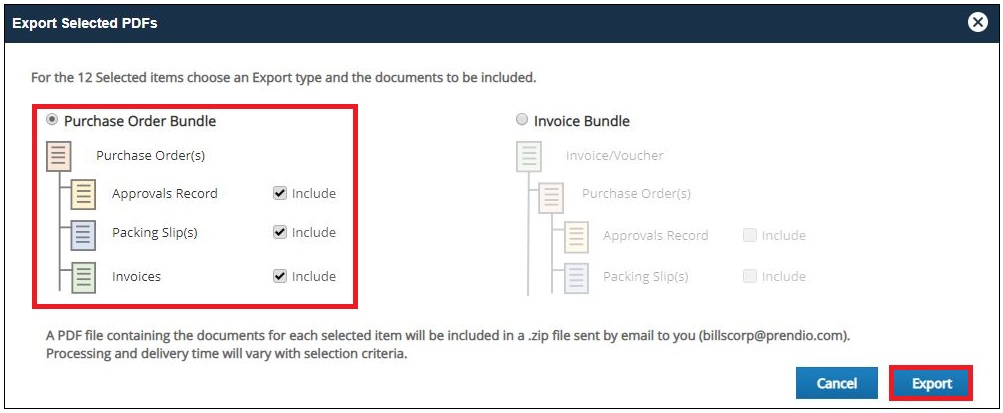
The Export Selected PDFs window opens. In this window either a Purchase Order Bundle can be selected including the Approvals Record, Packing Slips, and Invoices or an Invoice Bundle with the Approvals Record and Packing Slips for the selected vouchers.
In this example a Purchase Order Bundle was selected to include all of the selected documentation, then Export is pressed.
While the requested bundle is being processed most of the features in the Selected Actions pulldown menu are grayed out. The progress of this request can be monitored or checked by selecting Show Bundle Server Status.
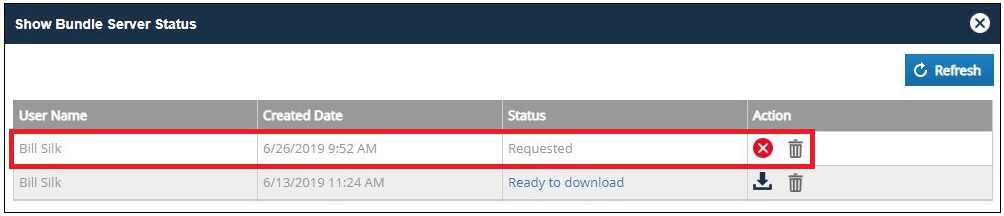
The Show Bundle Server Status window opens. This window displays the current and previous requests. Refresh can be pressed to update the status of the request and the Download icon will become available when the request is complete.
Note: The requester of the bundle will also receive an email message with a link to the bundle when it is complete so it is not necessary to monitor the status.
AP Management > Unpaid Bills:
When an AP Push is complete the vouchers that were pushed to QBD are moved to Unpaid Bills.
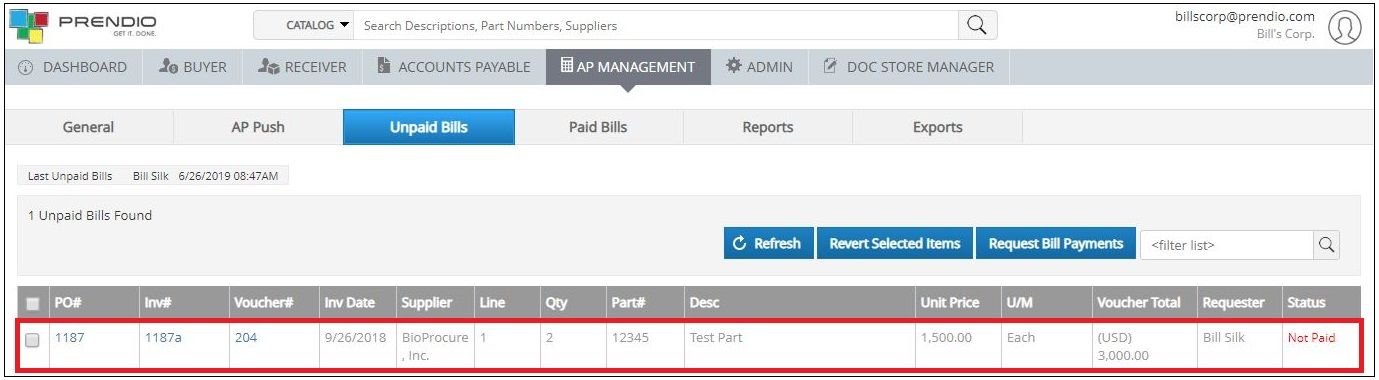
Note: In the example above this voucher was previously pushed to QBD and was also paid through QBD.
During the push not only are the selected vouchers pushed to QBD but a check for duplicates is made and the status of previously pushed vouchers is updated. Since the example above was paid through QBD it will be moved to Paid Bills during the push we are about to perform.
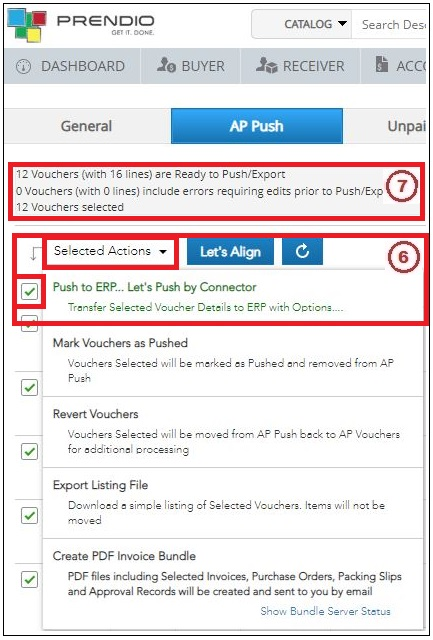
6. The top left Checkbox is again checked, this selects all of the vouchers in the window. Then Push to ERP...Let's Push by Connector is selected from the Selected Actions pulldown menu.
7. Note that the number of vouchers selected is updated.

8. The Let's Push window opens, this window includes a checkbox to update the remit to address in QBD if it differs from that specified in Prendio.
9. Press Push to begin the push process.
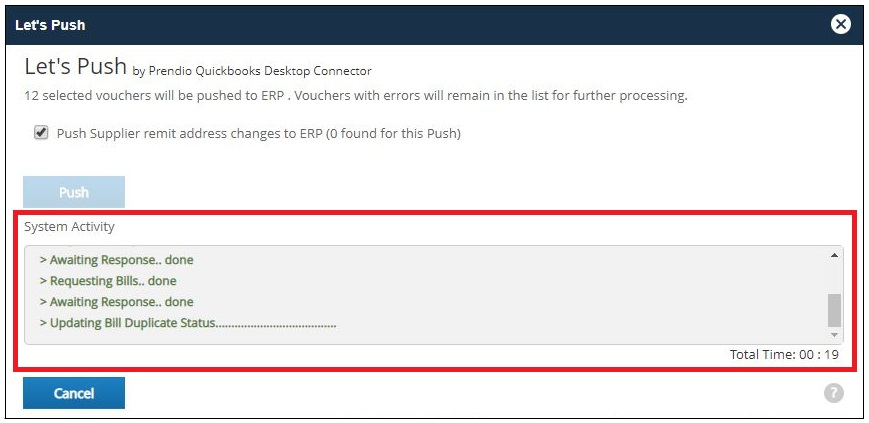
The progress of the push is reported in the System Activity field.
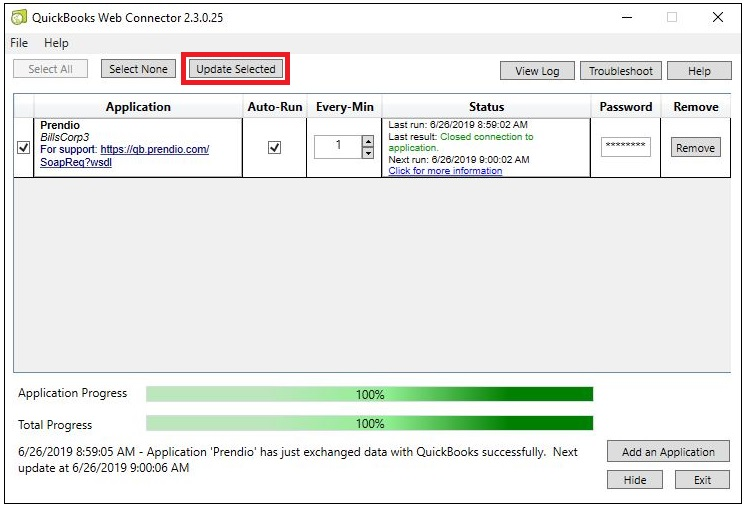
Reminder: Pressing the Update Selected button in the QBWC will continue the exchange of information when the systems are waiting.
10. When the push is complete these fields are updated.
11. The date and time of the last Bundle Export and Push are also updated.
AP Management > Unpaid Bills:
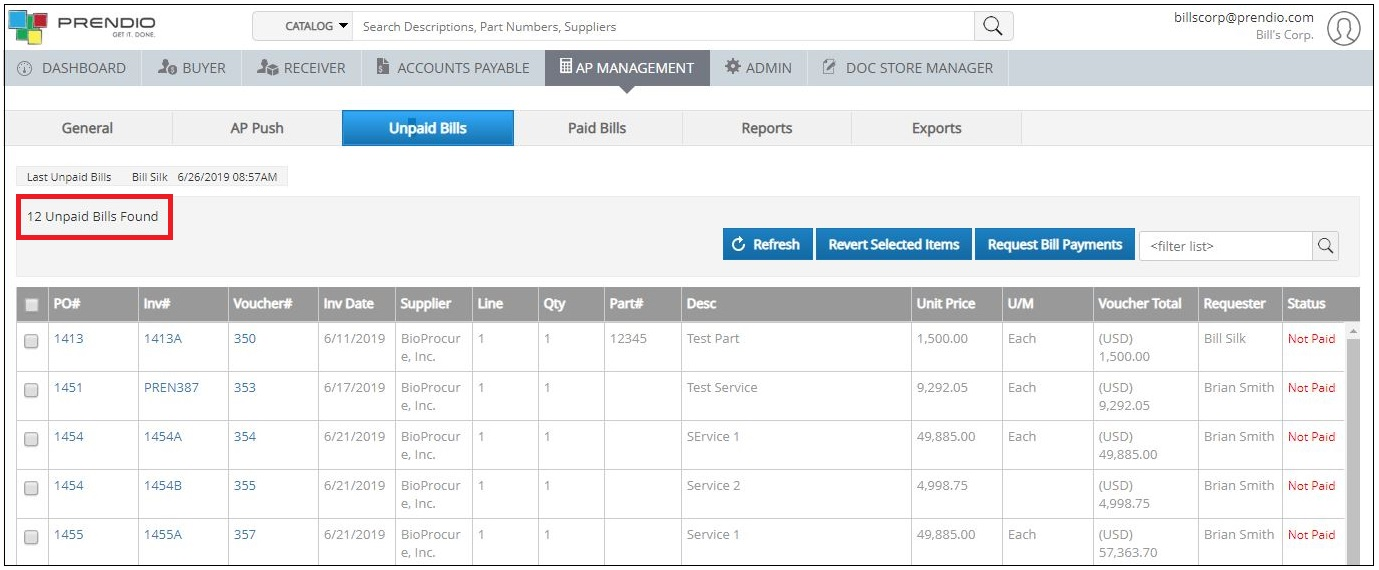
The 12 vouchers just pushed were moved to Unpaid Bills.
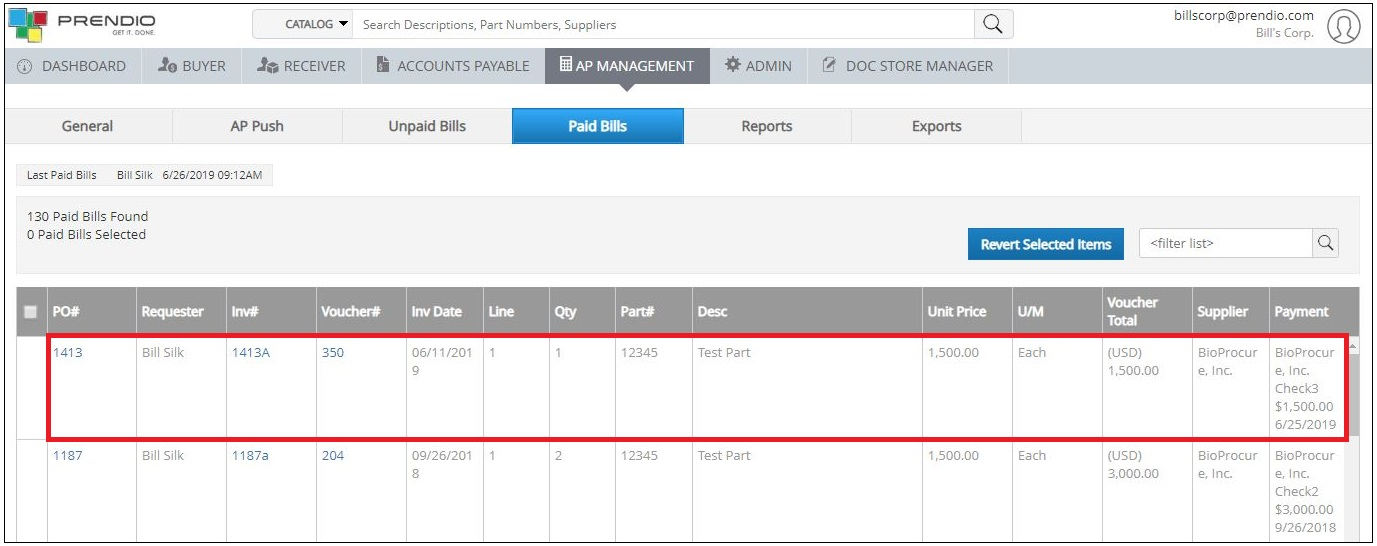
AP Management > Paid Bills:
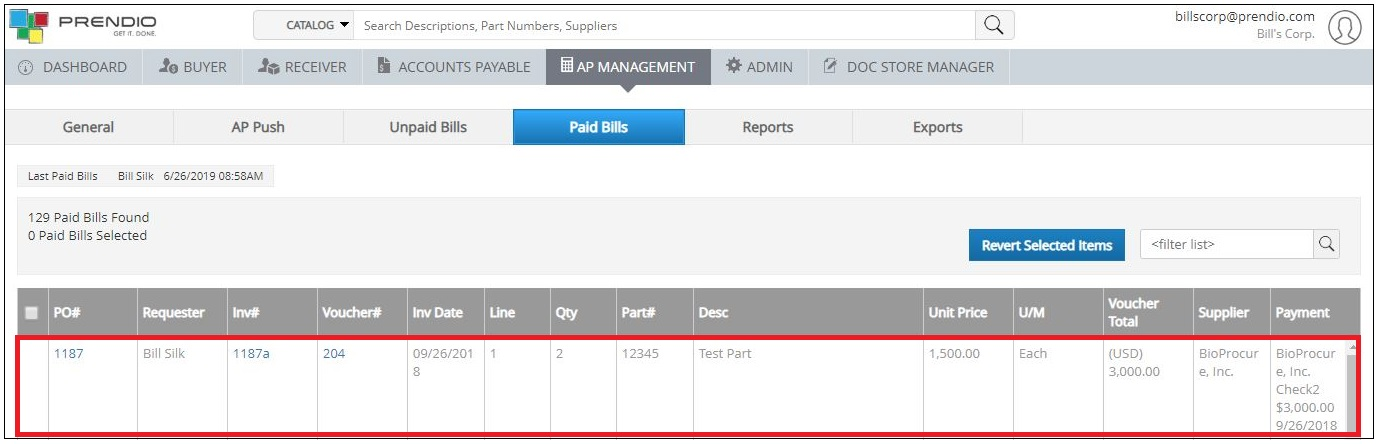
The voucher that was paid through QBD prior to this push was automatically moved to Paid Bills and includes the Payment Details in the Payment column.
QBD Received The Pushed Vouchers:
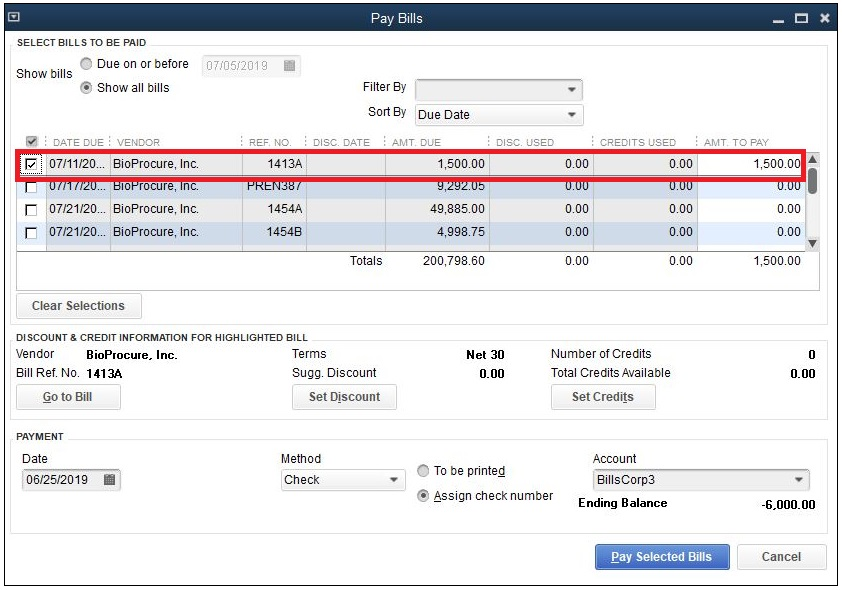
In the example above the vouchers just pushed display in QBD. One of these bills is now being paid so that a Request Bill Payments can be performed back in Prendio.
AP Management > Unpaid Bills:
As detailed earlier, bills paid through QBD are automatically updated during the next push. These bills can also be manually updated as needed as well.
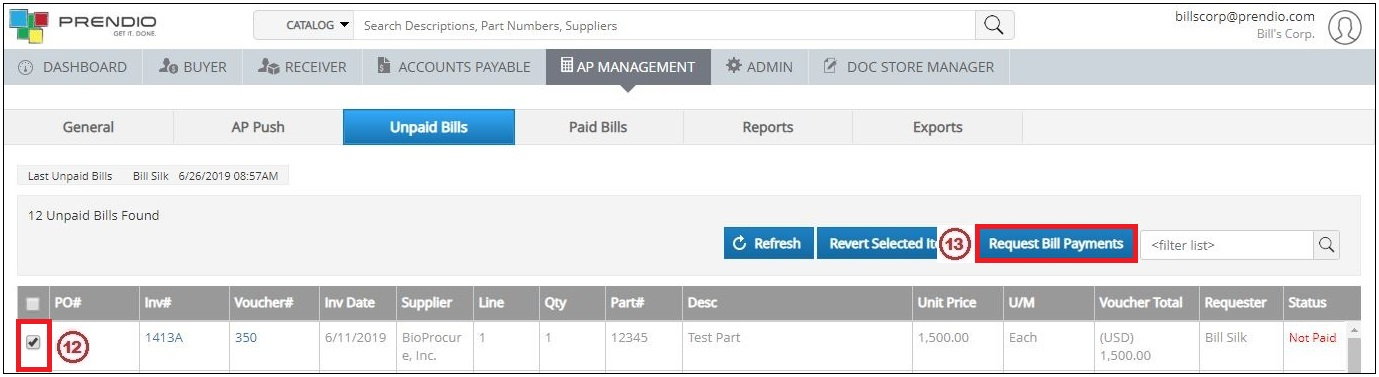
12. In Unpaid Bills the voucher just paid through QBD is checked.
13. Request Bill Payments is then pressed.
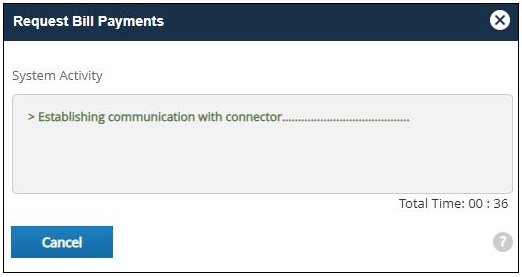
The Request Bill Payments window then opens, this window will close when the payment update is complete.
AP Management > Paid Bills:
The voucher that was paid through QBD just after this push was moved to Paid Bills and includes the Payment Details in the Payment column.