
About This Document:
This document details the set up of Department, GL Account, and Project Approvals. These resources are often referred to as Segments and each example will also include a Watcher. After this setup is complete a Cart Example will be used to illustrate the order of these approvals. The Req created will then be viewed from the Requester's Dashboard to monitor the Approval Progress as Approvals are made, all the way to when the Approval Process is complete.
Prerequisites:
This procedure requires the Accounts Payable role.
Notes:
This document assumes that the Accounts Payable User already knows how to create these Segments so only the Watcher and Approver additions are explained.
Projects are an optional Segment and are included in this document.
Accounts Payable > GL Accounts > Prendio GL Accounts:
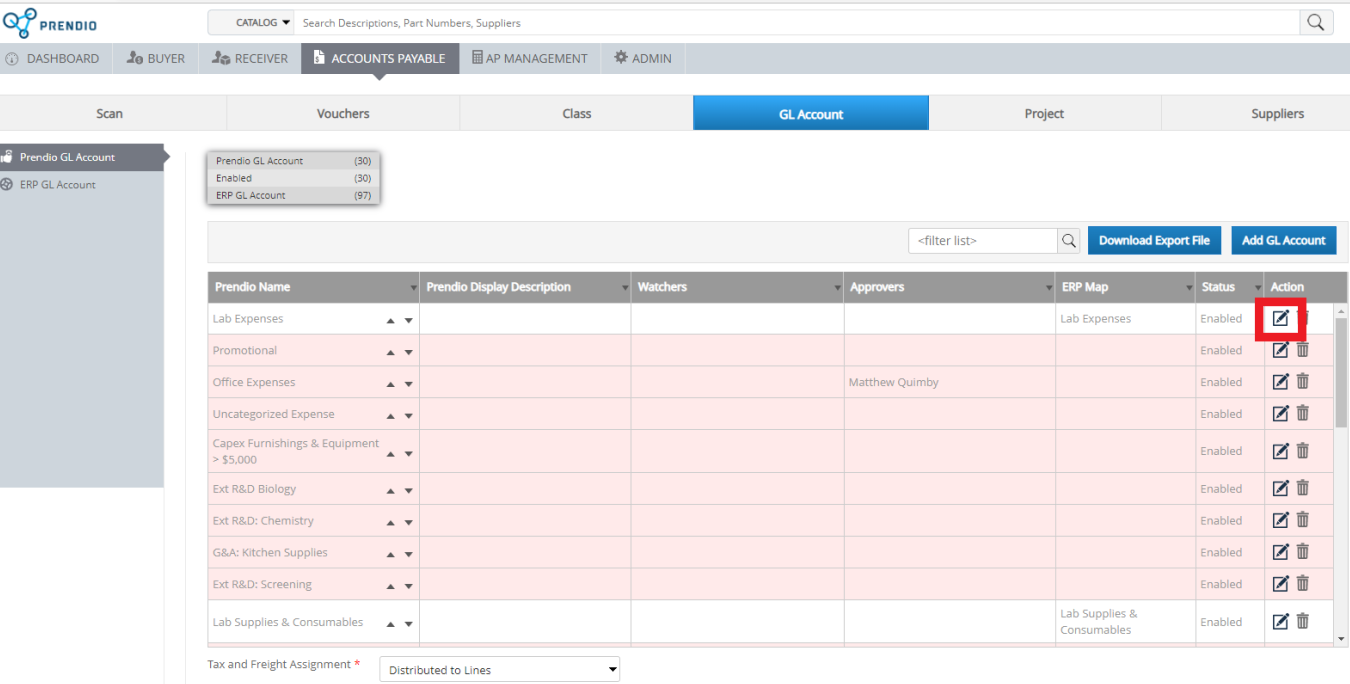
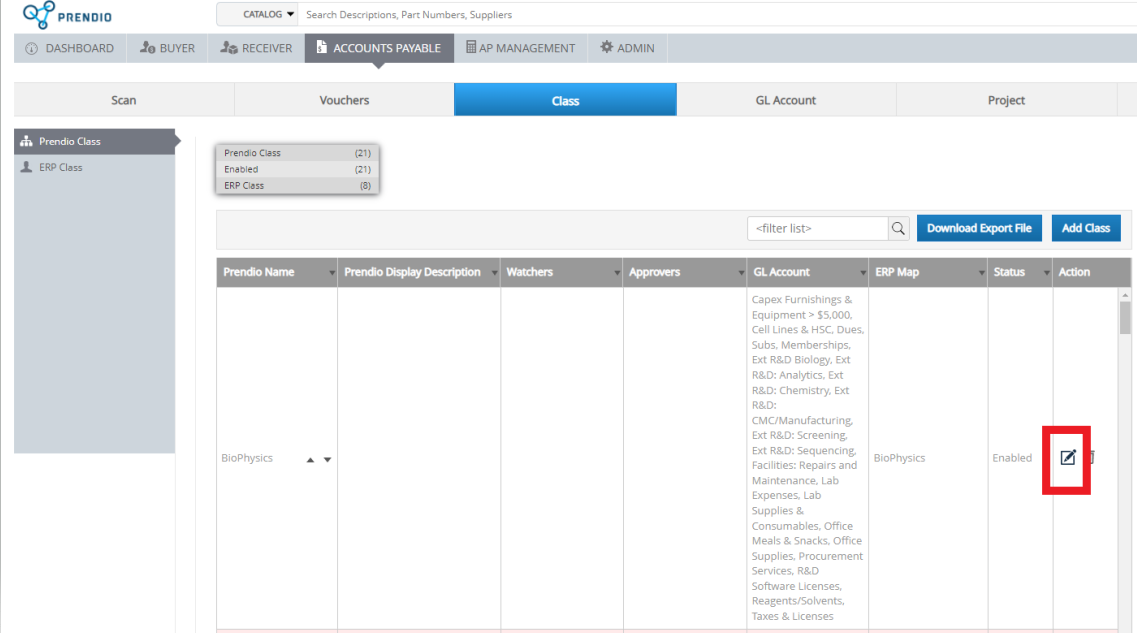
1. Edit the GL Account.
Notes:
First a Watcher will be added, then another Watcher will be added and selected as an Approver.
A Segment can have multiple Watchers but only one Watcher can be selected as an Approver.

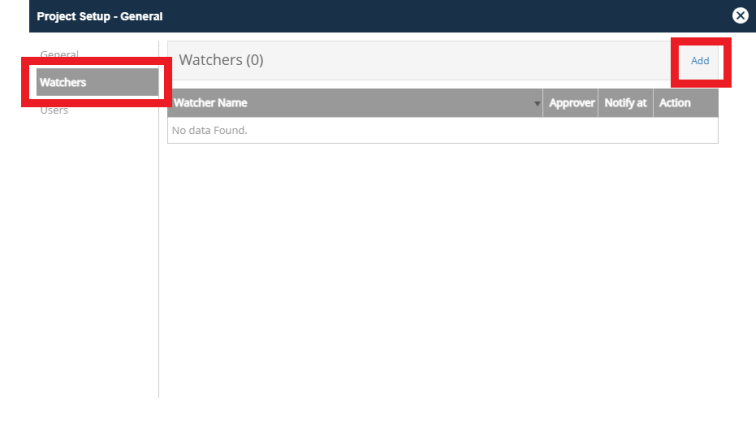
2. Select Watchers.
3. Press Add.
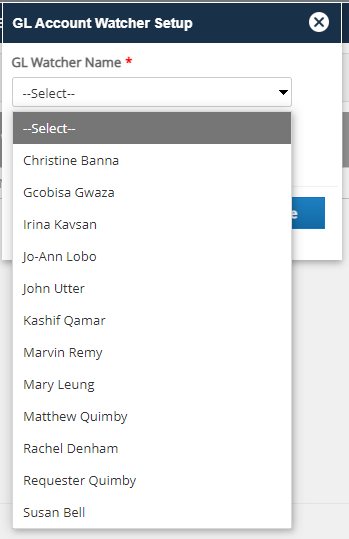
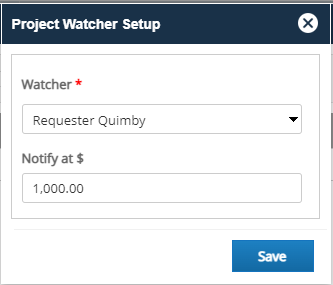
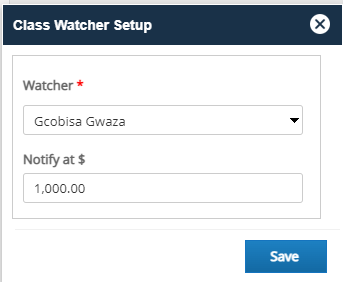
4. Select a Prendio User from the pulldown menu.
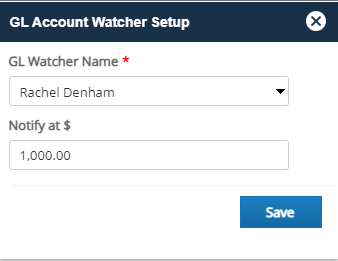
5. Enter an Amount at which the user will be notified.
6. Press Save.
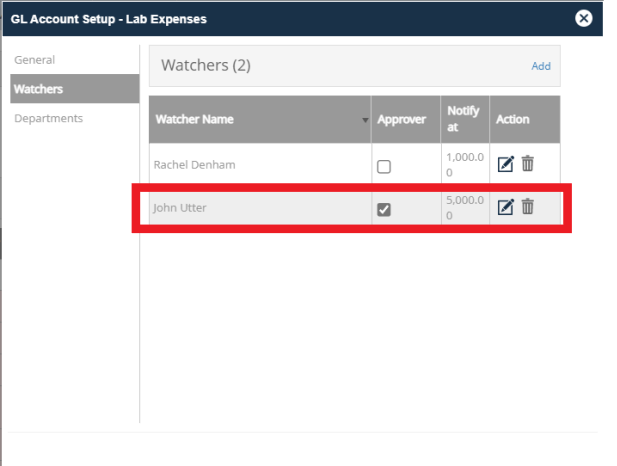
7. Follow Steps 3 - 6 to Add another Watcher, in this example a higher Notify at amount was entered because this person will be an Approver, so the box in the Approver Column was checked.
Select General, then press Save when complete.
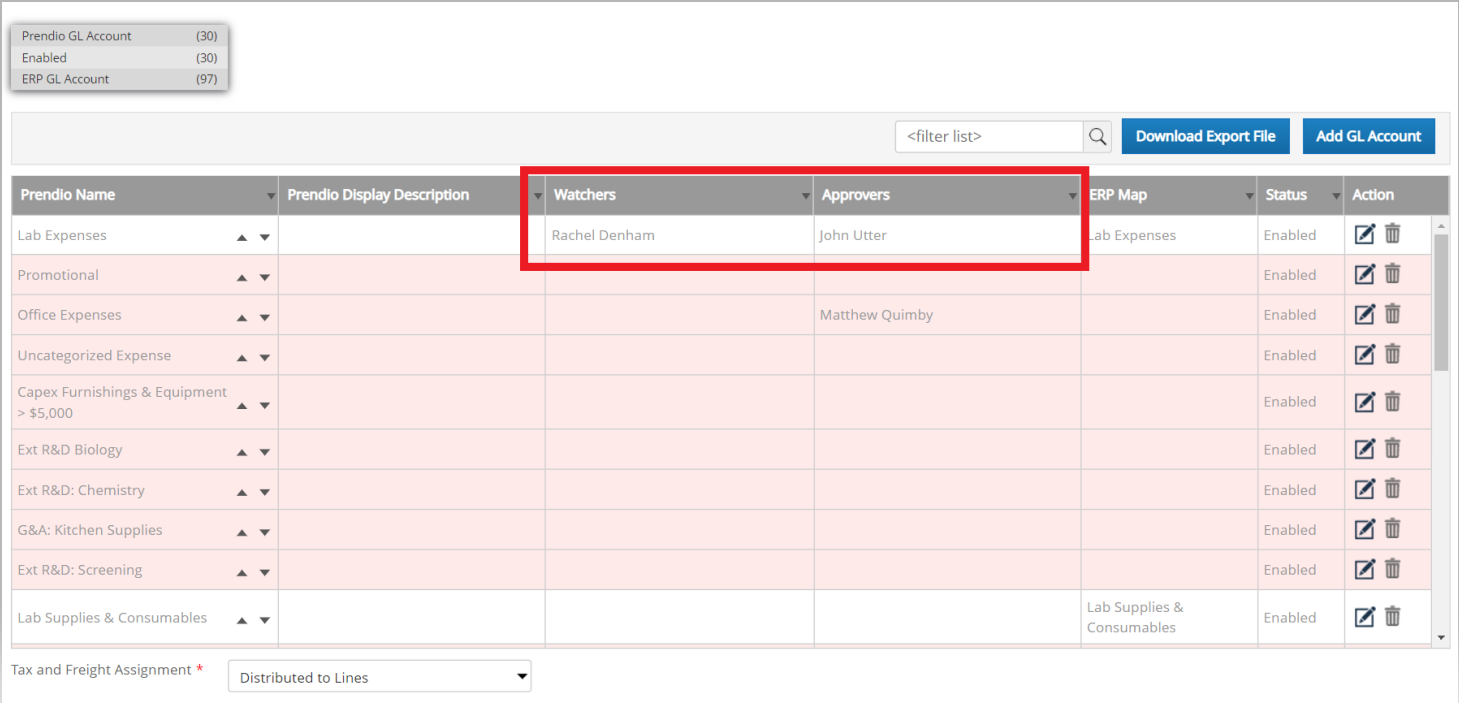
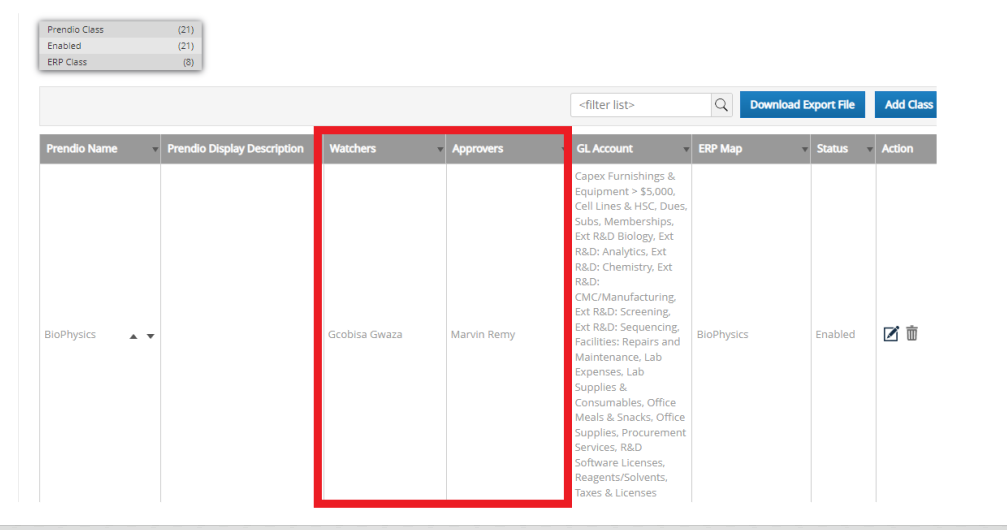
8. The Watcher and Approver now display for this segment.
Notes:
The steps for adding a Watcher and an Approver to a Department and a Project are the same.
You can skip to Step 25 to see how these changes affect a Cart creation if desired.
Accounts Payable > Projects > Prendio Projects:
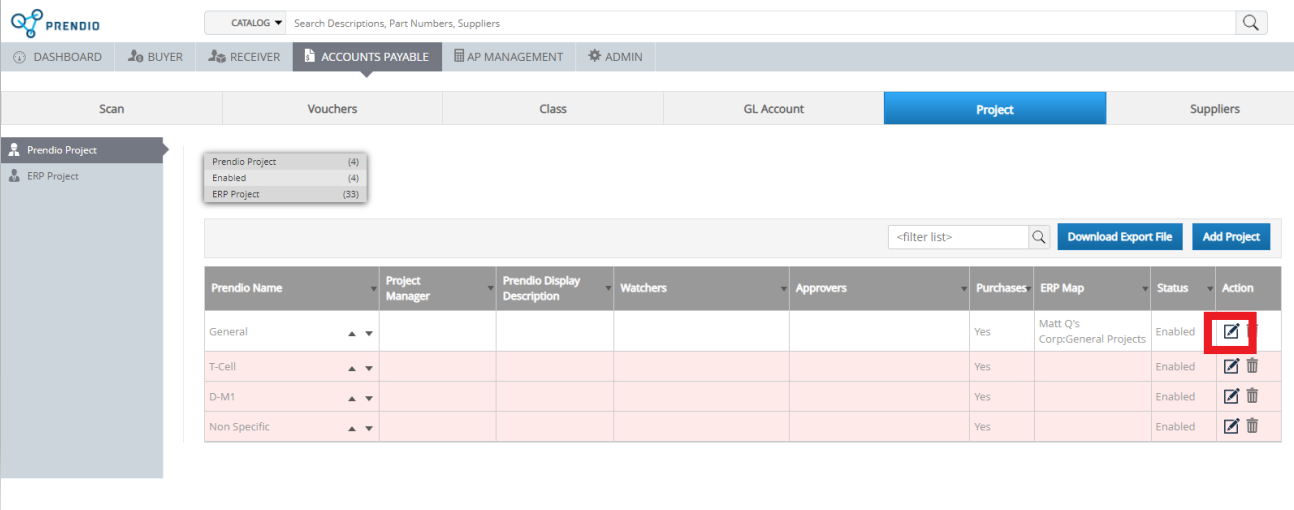
9. Edit the Project.
Notes:
First a Watcher will be added, then another Watcher will be added and selected as an Approver.
A Segment can have multiple Watchers but only one Watcher can be selected as an Approver.
11. Press Add.
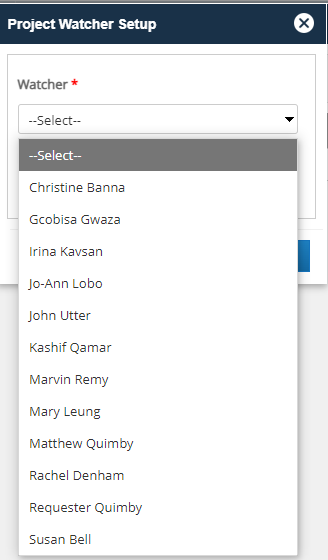
12. Select a Prendio User from the pulldown menu.
13. Enter an Amount at which the user will be notified.
14. Press Save.

15. Follow Steps 10 - 14 to Add another Watcher, in this example a higher Notify at amount was entered because this person will be an Approver, so the box in the Approver Column was checked.
Select General, then press Save when complete.
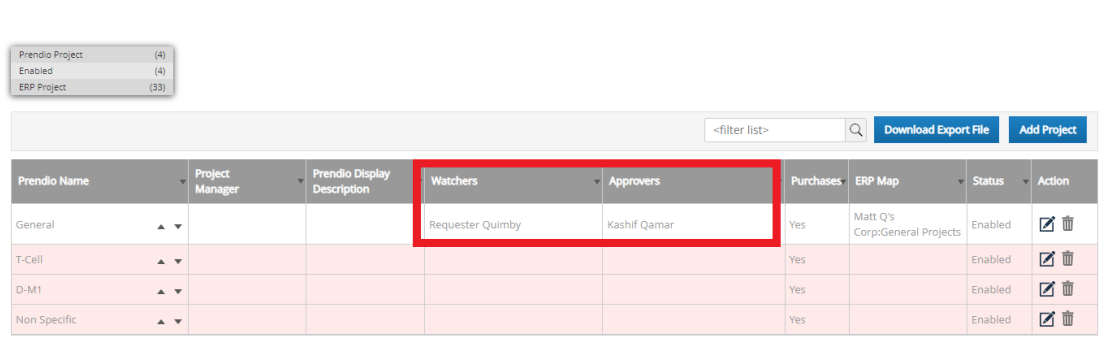
16. The Watcher and Approver now display for this segment.
Accounts Payable > Department > Prendio Departments (For this example, Class is an alternate name for Department):
Notes:
First a Watcher will be added, then another Watcher will be added and selected as an Approver.
A Segment can have multiple Watchers but only one Watcher can be selected as an Approver.
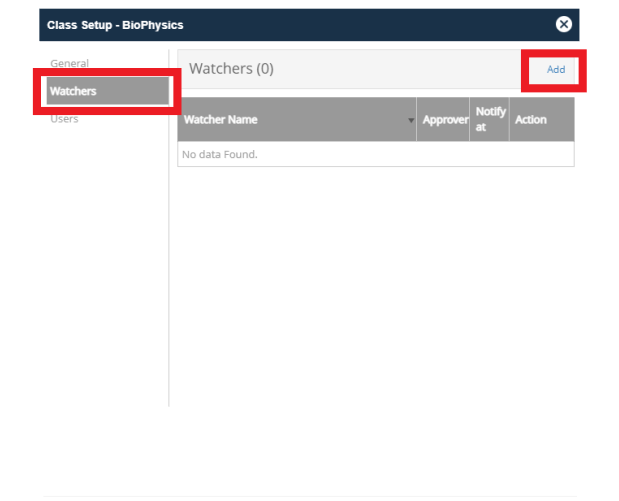
18. Select Watchers.
19. Press Add.
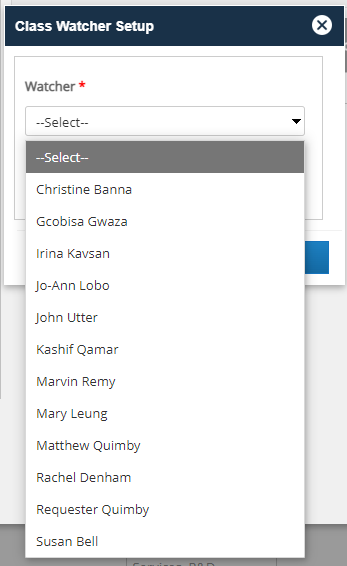
20. Select a Prendio User from the pulldown menu.
21. Enter an Amount at which the user will be notified.
22. Press Save.
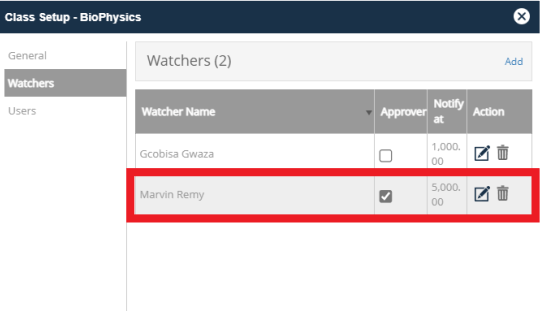
23. Follow Steps 19 - 22 to Add another Watcher, in this example a higher Notify at amount was entered because this person will be an Approver, so the box in the Approver Column was checked.
Select General, then press Save when complete.
Example Using A Cart:
25. The Requester is Christine Banna.
26. Christine's Personal Approval Path will be used for the Exceeded Spending Limit approvals in this example.
Requisition Approval:
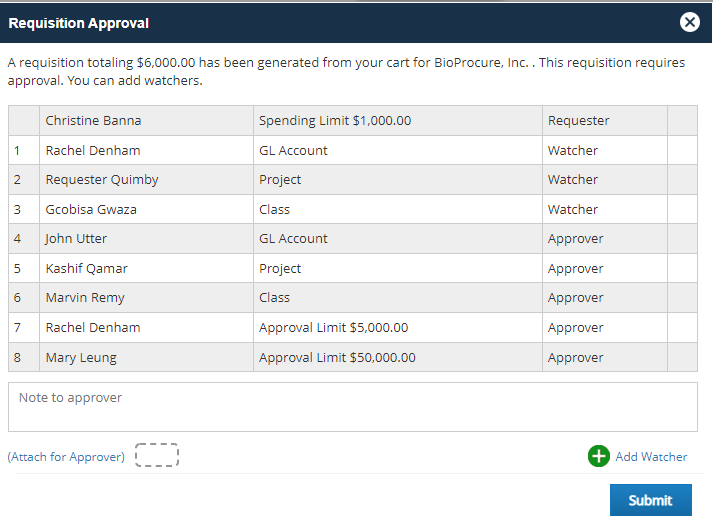
When this cart was submitted, the Requisition Approval window displayed the Approvers and Watchers that would be notified. The Approvers will receive an Email and a Dashboard Notification that their approval is required.
27. The Segment Watchers are displayed.
28. The Segment Approvers are displayed.
29. The Exceeded Spending Limit Approvers are displayed.
The Requester then monitored the progress of the Approvals as they occurred. This can be done from the View All link on the My Orders Bar on the Prendio Dashboard. Clicking on the link to the Req in the Req# column.
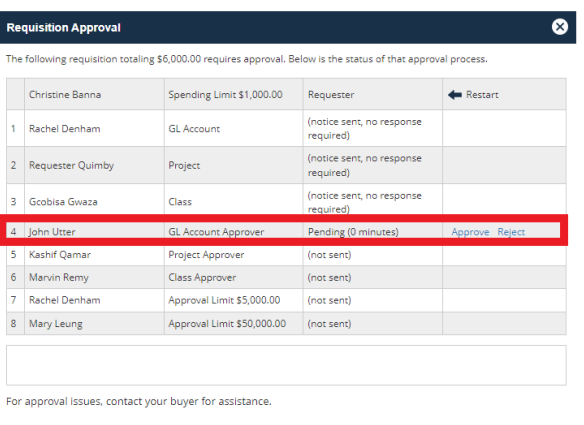
30. The GL Account Approver and Segment Watchers arethe first to be notified., all other notifications are Pending. Watchers for each segment are notified but do not need to take action.
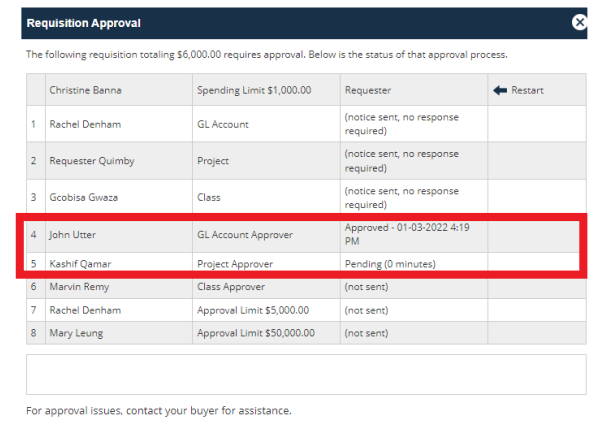
31. After the GL Account Approver approved the Req, the other Segment Approvers were notified. The Project Approver first , followed by the Department (Class) Approver.
32. After the GL Account Approver approved the Req, the Project Approver were also notified.
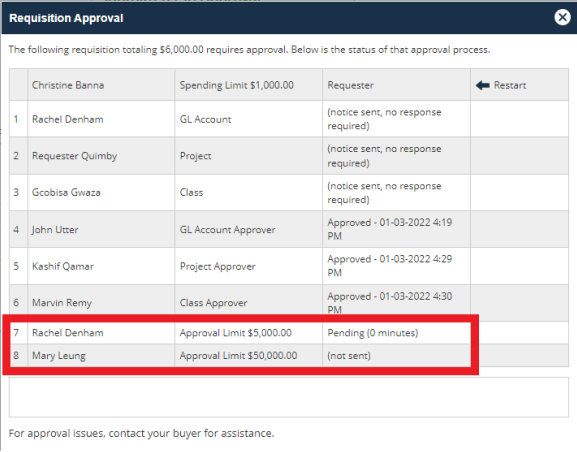
33. After the Segment Approvals were complete, the Exceeded Spending Limit Approvers were notified.

34. When all approvals are completed, the Req Order History displayed that it is in the Buyers' Queue waiting for the BioProcure Purchasing Agent (Buyer) to process the Purchase Order for this Req.

35. Order History also displays the Requisition Approvals that took place.