
Introduction
When using Prendio you are working with two companies. You
are working with Prendio, the Software manufacturer, and BioProcure, your
Service Provider. BioProcure also uses Prendio.
Help Requests
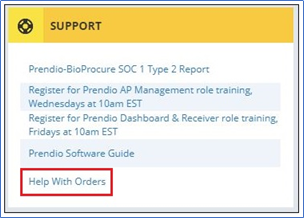
On the Prendio Dashboard below the
Support Heading is a Link to Help with Orders. This will create an Email
Message to help@bioprocure.com. Be as
descriptive as possible with your question or request so our Customer Service
Team can quickly route it to the appropriate team.
About This Document
This document details the features
of the Prendio Requester role.
Prerequisites
The Prendio Requester role is
required, by default all Prendio Users have this role.
Agenda
Overview Of The Dashboard
Overview Of The Dashboard
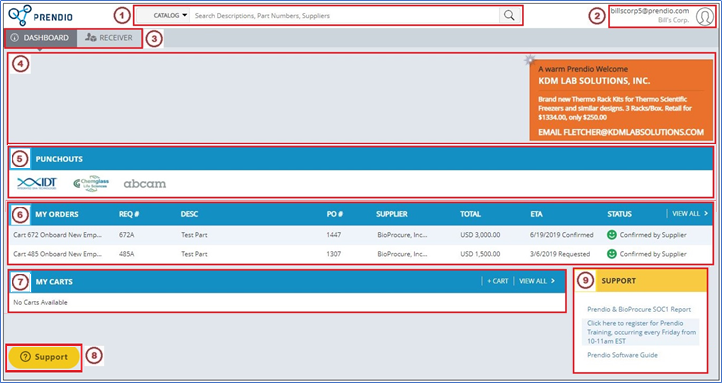
2. This field displays how you are
logged on to Prendio.
3. There are tabs on the Dashboard
for each Prendio Role. The tabs that display depend upon the Prendio Role(s) your Admin has assigned to you.
4. This is the Notification field.
In this example a Supplier Welcome Card appears. Supplier Rating Cards may also appear in this field along with Prendio
Notifications. Prendio Notifications include Approval Requests, Proxy Requests, and Time Table Requests. If a
Notification appears you can click on it to reply to the request.
6. The My Orders field
displays the orders that you have submitted. Not all of your orders will
display on the Dashboard, click View
All to display all orders.
7. The My Carts field
displays the carts that you have submitted. Clicking on + Cart will
create a new cart. Not all of your
carts will display on the Dashboard, click View All to display all
carts.
8. Click on the Support icon
to maximize the Support Search window. Use this window to search for
information on Prendio
functions.
9. The Support field contains
links to announcements as well as a link to the Prendio Software Guide.
In the software guide you
can search for information and there is also fields on information by topic.
Note: Missing from
this screenshot is the Time Table field. This is an option that allows the user
to enter how much time was spent on a Project. If this option was enabled for
your company, this field would display between the My Carts and the Support
fields.
How To Create An Order
There are 3 ways to create an order, Punchout, Catalog, and Manual cart.
All orders processed through Prendio start as a Cart. When
that Cart is submitted the Cart is Closed and a Requisition is created. The Req
may need to go through Approvals first but when it reaches the BioProcure Buyer
and is Confirmed with the Supplier, a PO Number is assigned.
Once an order is placed, the Prendio Three-way Match must be
Complete to be processed through Prendio. This match consists of the PO + Packing Slip + Invoice.
Creating A Cart With A Punchout:

1. Click
on the IDT Punchout icon.
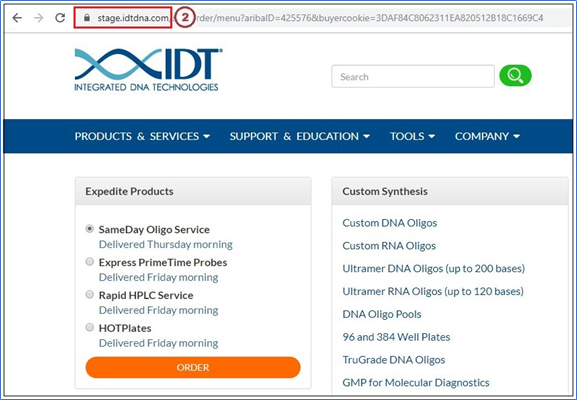
2. This will take you to the Supplier’s Punchout Website.
A product is then selected. Supplier
Punchout Websites vary, in this example a product category is selected,
followed by the product itself.
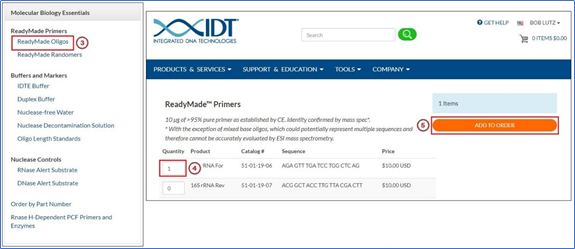
3. ReadyMade Oligos is selected.
4. A Quantity
of 1 is selected for the product.
5. Add To Order is then pressed.
Note: If the
Punchout Items all need to be on the same Purchase Order, select all of these
items before Submitting or Checking Out of the Punchout website.

6. This particular punchout site
requires that you enter your First and Last Name before checking out.
7. Submit is
then pressed.
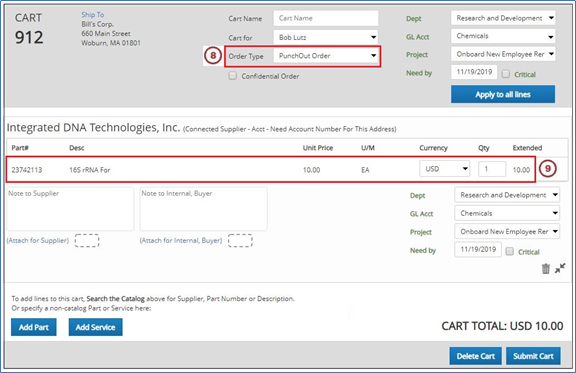
8. A new cart is automatically
created with an Order Type of PunchOut Order.
9. The details
of the selected product appear in the
cart.
Note: Do not change
the date in a punchout order, this will change the Order Type to Buyer will
place order.
Creating A Cart Using The Catalog:
In this example Gloves is used in a
Catalog Search and a cart is created from the type of glove selected.
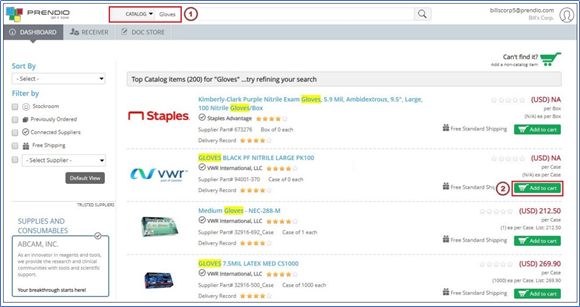
1. In the Catalog search
field Gloves is
entered.
2. Prendio then finds products that
match the search criteria and Add to cart is pressed for the desired product.

3. A new cart is automatically created
with the details of the selected product.
Creating An Order From A Manual Cart:
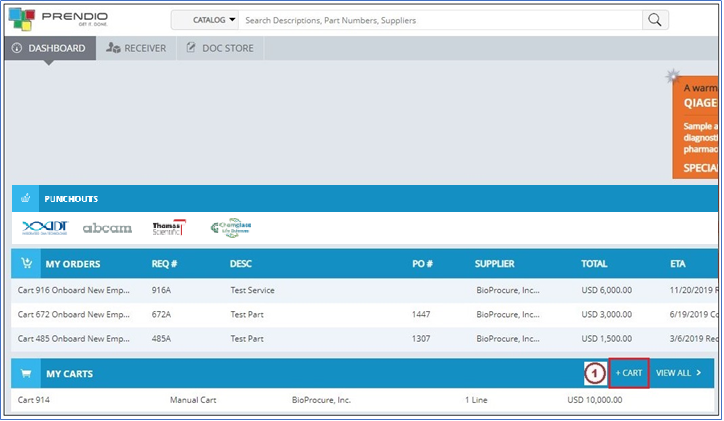
1. From the Dashboard My Carts field click on +Cart.
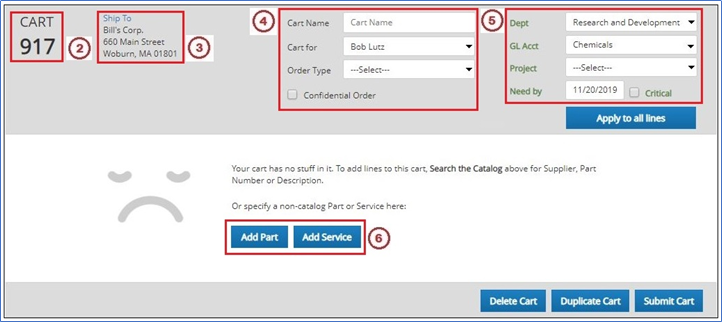
2. A unique Cart Number is assigned.
3. Selecting a Ship To address is mandatory.
Note: When you create a ticket for yourself, your Personal Approval Path will be followed if the order exceeds your Spending Limit. When you create a ticket on behalf of another user, that user’s Personal Approval Path will be followed if the order exceeds their Spending Limit.
The selections for Order Type: are I will place the order and Buyer will Place Order.
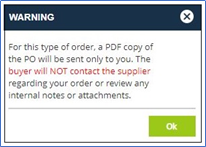
When I will place the order is selected
the Requester will place the order with the supplier and the Buyer will email
the PO to the Requester.
6. When creating a Cart press Add Part to create
a Part Line Item or Add Service to create a Service Line Item.
In this example, Add Part will be
used.
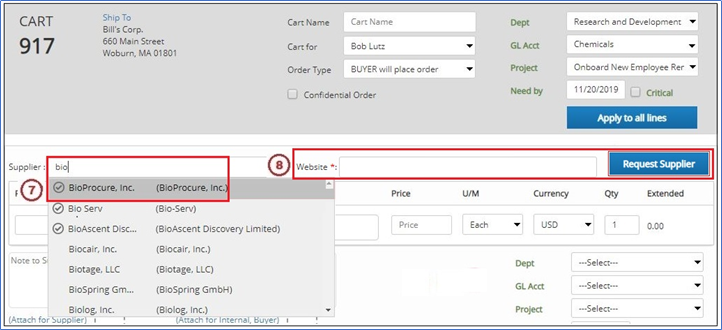
7. in the Supplier: field
start typing the name of the Supplier until it is recognized, then select that supplier.
Note: Suppliers
that appear when typed are in the Prendio Catalog. Suppliers that display a Circled
Check Mark next to their name are connected to your company. If a Supplier is
not connected to your Company BioProcure will complete this process.
8. If the supplier name is not in
the catalog it will need to be added. Type the Supplier Name then enter the supplier website
in the Website: field, then press Request
Supplier.
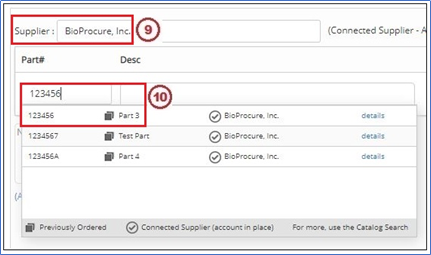
9. The Supplier was selected.
10. In the Part# field start typing the part number.
If it was previously ordered it will
be recognized.

12. Notes and Attachments for the Supplier and Internal, Buyer can be added using these fields.
13. Pressing the Apply to all lines button
will populate the Department, GL Account, and Project fields for each Line Item in the
cart.
14. The Need
by date defaults to 7 days in the future and is interactive so can
be edited. Check the Critical checkbox if the
date is critical.
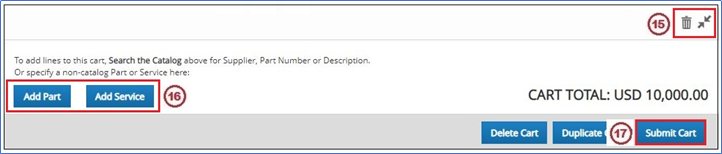
15. Use the Trash
Can icon to delete a line item in
a cart. The Arrow Head icons are used to minimize (arrows pointing in) and maximize (arrows
pointing out) a line item.
16. Use the Add
Part or Add
Service buttons to add another Part or Service line item to the cart.
17. Press the Submit Cart button
when your order is ready to be submitted for processing.
Note: When a cart is submitted a
requisition is created. The requisition is assigned a number consisting of the
cart number with the letter A appended to it. In this example the requisition
number would be 917A.
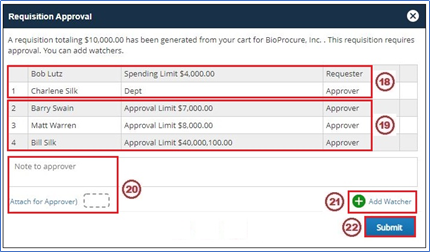
18. This window displays the Requester of the
cart and his or her Spending Limit. In this
example Department approval is also required.
19. Because the amount of this purchase exceeded
the Requester’s Spending Limit, Approval is required.
20. This window also includes fields to enter a
note and/or attach file(s) for the approver.
21. Watcher(s) can
also be added by clicking Add Watcher. Clicking Add Watcher will
take the user to a list on your company’s
Prendio users. When Watchers are added, they will be notified of the order but
do not need to approve the
order.
22. Press Submit to submit the Cart. This will create the requisition
for the Buyer to process after the approval process is complete.
Prendio Receiver Role
Prendio uses a three-way match of the Packing Slip (Receipt), Invoice
(Voucher), and Purchase Order when processing an order. This information is
also pushed to your ERP System when the order is complete. For this reason, it
is very important for your Packing Slips to be processed when they are
received. Processing of the Packing Slips to Receipts is done by the Prendio
Receiver Role.
Uploading A Packing Slip:
Note: When uploading a Scanned PDF Packing
Slip or Invoice into the Scan Upload window of Prendio for best performance, a maximum
file size of 175 KB should be targeted.
Requester > Scan > Scan Upload:
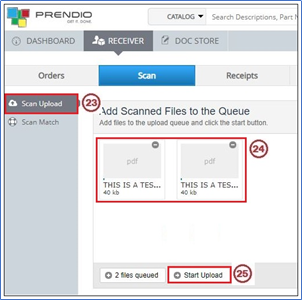
24. Scanned Packing Slips in PDF format are dragged into this window.
25. Start Upload is pressed.
Matching A Packing Slip To A Purchase Order:
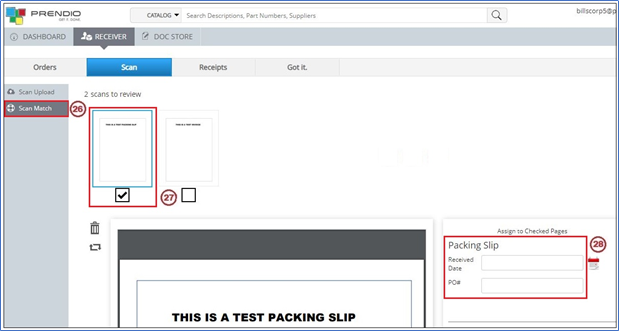
26. Scan Match is
selected.
27. The Packing
Slip is selected and checked.
28. The date the
Packing Slip was received and the PO it is to be matched are entered.
Note: If BioProcure
performs your Company’s Accounts Payable Services the Steps above will be completed
by a BioProcure AP Agent and Step 28 will be grayed out.